When it comes to upgrading your vehicle’s sound system, one of the most important decisions is selecting the right speaker size. As someone who has installed countless mobile audio systems over 15 years, I’ve seen firsthand how fitment issues can ruin an otherwise great upgrade. However, with the right process and resources, finding speakers that are perfectly matched to your vehicle’s specs is very achievable.
In this article, I want to share everything I’ve learned to make this task as simple and painless as possible. We’ll cover car speaker size measuring techniques, lookup resources, factors beyond size to consider, installation tips, and more. By the end, you’ll be well-equipped to pick out speakers that will deliver great sound for years to come. Let’s get started!
Know Your Vehicle’s Speaker Mount Dimensions
Measuring the speaker mounting locations is essential for finding fully compatible speakers. But it can be tricky to get accurate readings, so I’ll outline the proper method.
The key measurements are:
- Mounting depth: Distance from rear of speaker grille to back wall of mounting baffle/location.
- Mounting diameter/width/height: Outer boundary of where speaker attaches to baffle/location.
- Cut-out diameter: Size of hole in baffle that speaker cone/basket pass through.
It’s critical to record ALL dimensions for each location. People often only measure depth, not realizing other specs also matter. You’ll also want to photograph each mounting spot for future reference when shopping.
When actually taking measurements, start by removing any existing speakers if possible. This allows seeing the raw baffle clearly. Use a flexible tape measure and record dimensions in both inches and millimeters to decimals of a centimeter, like 5.625 inches. Doing so ensures you’ll find options whether shopping domestically or internationally.
Be particularly careful measuring recessed baffles, as depth readings can be easily over or underestimated. And always double check your work, as incorrect numbers will only lead to future headaches. Spending extra time here absolutely pays off later!
Vehicle-Specific Speaker Fitment Databases
Once armed with your vehicle’s mounting specs, I highly recommend referring to the car speaker size chart below for your car model and recommended car speaker size.
Car Speaker Size Chart
| Year | Make | Model | Front Speaker Size | Rear Speaker Size |
|---|---|---|---|---|
| 2020 | Ford | F-150 | 6×9″ | 6.5″ |
| 2021 | Toyota | Camry | 6.75″ | 6×9″ |
| 2019 | Honda | Civic | 6.5″ | 6.5″ |
| 2022 | Chevrolet | Silverado | 6.5″ | 6×9″ |
| 2021 | Nissan | Altima | 6.5″ | 6.5″ |
| 2018 | BMW | 3 Series | 4″ | 6.5″ |
| 2020 | Audi | A4 | 6.5″ | 6.5″ |
| 2019 | Mercedes-Benz | C-Class | 6.5″ | 6.5″ |
| 2021 | Volkswagen | Jetta | 6.5″ | 6.5″ |
| 2020 | Subaru | Outback | 6.5″ | 6.5″ |
| 2019 | Mazda | 3 | 6.5″ | 6.5″ |
| 2021 | Hyundai | Elantra | 6.5″ | 6.5″ |
| 2018 | Kia | Optima | 6.5″ | 6.5″ |
| 2020 | Jeep | Wrangler | 4″ | 6.5″ |
| 2021 | Dodge | Charger | 6.5″ | 6.5″ |
| 2019 | Ram | 1500 | 6×9″ | 6.5″ |
| 2022 | Chrysler | Pacifica | 6.5″ | 6.5″ |
| 2020 | GMC | Acadia | 6.5″ | 6.5″ |
| 2021 | Buick | Enclave | 6.5″ | 6.5″ |
| 2019 | Cadillac | XT5 | 6.5″ | 6.5″ |
| 2022 | Infiniti | QX60 | 6.5″ | 6.5″ |
| 2021 | Acura | TLX | 6.5″ | 6.5″ |
| 2018 | Lexus | RX | 6.5″ | 6.5″ |
| 2020 | Lincoln | Nautilus | 6.5″ | 6.5″ |
| 2021 | Volvo | XC90 | 6.5″ | 6.5″ |
| 2019 | Mini | Cooper | 4″ | 6.5″ |
| 2022 | Porsche | Cayenne | 6.5″ | 6.5″ |
| 2021 | Jaguar | F-Pace | 6.5″ | 6.5″ |
| 2018 | Land Rover | Discovery | 6.5″ | 6.5″ |
| 2020 | Tesla | Model 3 | 6.5″ | 6.5″ |
| 2021 | Genesis | G70 | 6.5″ | 6.5″ |
If you cannot find your car on the speaker size chart above, check from your car manufacturers’ website. Simply enter your year/make/model, and the speaker size chart database displays optimal speaker options with the corresponding mounting specs. This eliminates any guesswork, as you can be certain a listed speaker will physically install without modifications. I always start here to shortlist 2-4 potential choices per spot.
The database approach is faster and less frustrating than endlessly searching store sites or catalogs. It ensures your options are pre-filtered to only include those designed and tested to fit your vehicle’s factory locations perfectly out of the box. This level of curated fitment info can’t be beaten.
Flexibility with Brackets and Adapters
There may be occasions where your vehicle’s stock speaker spots present limitations, such as unusually small diameters. In these cases, simple adapter kits open up your compatibility enormously.
Many reputable brands make aftermarket mounting solutions like “DIN style” and “Universal” brackets. These essentially modify the speaker’s mounting footprint to make a wider selection of options fit each of your vehicle’s baffles. For example, adding an extra 0.5-1” of usable depth.
Just be sure to account for the adapter’s added thickness/dimensions when measuring. But overall, they provide hassle-free flexibility to equip your ride with higher performing speakers that stock locations alone could not support. It’s an inexpensive modern solution I highly recommend trying before modifying vehicle baffles.
Power Handling and Component Sets
When upgrading, it’s important the new speakers can handle the power output of your vehicle’s factory head unit or aftermarket stereo. Under powering speakers risks damage and affects how long they’ll sound their best.
As a general guideline, most OEM head units put out around 20-50 watts per channel into 4 or more speakers. So I recommend component speaker sets (separates tweeter and woofer) rated to handle 25-75 watts RMS comfortably. Getting ones on the higher end of this range gives breathing room as you modify the system over time.
Higher-end component sets also utilize crossovers to optimize frequency handling between the tweeter and woofer. This improves clarity and off-axis dispersion for a wider, more three-dimensional soundstage. They’re absolutely worth the small premium over coaxial “peerless” style speakers for a significantly upgraded listening experience.
Installation Tips and Tricks
Once you’ve selected the perfect speakers for fit and specs, the installation is key to ensuring they deliver for years to come. Here are some of my tried-and-true methods:
- Carefully unpack each speaker and inspect for any shipping damage before proceeding. Test them to be sure they weren’t affected.
- Use a bit of silicone lubricant on the mounting tabs for easy adjustments during aiming/positioning later on.
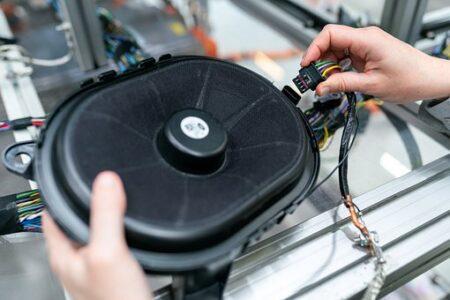
- Attach speaker wire with quality crimp connectors or solder and heat shrink for long-term reliability.
- For door panel/grille mounting, take your time to gently bend tab clips with pliers as needed. Rushing often leads to panels that won’t reinstall cleanly.
- Use the supplied speaker gaskets/foam rings to properly seal each speaker for optimal bass response and water resistance.
- Slowly tighten screws in a crisscross pattern to evenly compress mounting tabs. Overtightening can crack tabs or deform cones.
- Double check wiring polarity (+/-) before finalizing, as improperly phased speakers will sound weak or hollow.
Proper installation accessories like mounting rings, screws, wire, and connectors make a world of difference in the long-run too. Taking your time ensures the new speakers will continue performing beautifully trouble-free.
Final Thoughts
Even with the perfect speakers installed flawlessly, occasional issues may arise down the road that I’m always here to help with. Whether it’s simply re-aiming components for a better soundstage, replacing worn out speaker terminals, or diagnosing strange noises – you are welcome to contact me.
My passion has always been helping audio loves get the most from their car audio. So whether you have additional questions now or further along, please feel free to reach out. I’m here to share my knowledge so you can fully enjoy your upgraded car sound systems for many happy miles to come!
Also read:
Best 5×7 Car Speakers Reviews- Top 7 Picks and Buying Guide
Best 6×8 Speakers for Bass – Top 10 Reviews and Buying Guide
Best 4×6 Speakers with Good Bass- Top 8 Reviews

Kenny Owen is an acclaimed audio expert and longtime enthusiast with a deep passion for sound technology. With over 15 years of experience in the car and home audio industry, Kenny has established himself as a trusted authority on everything from speaker setups and amplifier configurations to the latest audio equipment and innovations.
Through his engaging writing style and meticulously researched articles, Kenny shares his vast knowledge on optimizing audio systems for superior sound quality. He provides in-depth tips and tricks for achieving the best listening experience, whether it’s tuning a car’s audio system for an immersive musical journey or creating a high-fidelity home theater setup. Additionally, Kenny’s comprehensive buying guides empower readers to make informed decisions when investing in audio components, ensuring they get the most bang for their buck.
