Adding a high-quality subwoofer remains one of the best ways to take your home audio or car audio to the next level. However, to maximize its potential, you must mount it in an appropriate enclosure. And this is where this extensive guide on how to make a subwoofer enclosure comes in. If you have been using custom sound systems for a long or if you are just starting as a beginner in the audio field, you should find all the details that you need about designing, creating, and integrating a perfect subwoofer box into your system.
From a basic understanding of enclosures used for subwoofers through step-by-step instructions for making them, we will provide expert tips and industry insights along with proven techniques so that your project becomes successful. Let’s discuss how to build a sub woofer box and the best way to go about building one that will redefine the music experience.
Understanding Subwoofer Enclosure Basics
Before discussing how to make a subwoofer enclosure, let us focus on why the enclosure is very important in determining the overall performance of your subwoofer before we can get into how to make a subwoofer enclosure. The “residence” of a subwoofer driver is its enclosure which controls air and vibrations emanating from a subwoofer, this affects what kind of low-frequency sound you will get.
Best 8 Inch Subwoofer Reviews: Unleash Thunderous Bass!
Different types of enclosures exist for subwoofers each with its positives and negatives:
- Sealed Enclosures: Sealed enclosures have an airtight design that allows the diaphragm (driver) to freely move back and forth. They produce taut well-defined bass but they are generally more compact and easier to build as compared to other options.
- Ported (Vented) Enclosures: Ported enclosures have tuned ports or vents allowing more air to move by the speaker at lower frequencies. This gives it much deeper bass with a lot more power than a sealed enclosure though lacking some control and tightness.
- Bandpass Enclosures: Bandpass enclosures are a more complex design that combines a sealed chamber and a ported chamber. In this layout, they have been tuned to produce a desired frequency range, often with very high output levels. Though usually bigger and trickier to construct, bandpass enclosures can deliver an impressive low-end punch.
The choice between these enclosure types will depend on your personal preferences, the characteristics of your subwoofer driver, and the specific requirements of your audio system. Here you can see that how to build a custom subwoofer box greatly varies depending on the enclosure type you picked.
Measuring and Choosing the Right Subwoofer
Before you can start planning your subwoofer enclosure, you’ll need to have a clear understanding of the subwoofer driver you’ll be using. Some considerations here include its size, power handling ability, and other major specs.
To get the best out of your system, you have to match a subwoofer with an enclosure. When it is too small in size, then it can have trouble producing deep impactful basses while if it’s too large in dimensions there could be a boomy low-end that cannot be controlled.
The following are some of the aspects that must be put into consideration when selecting a subwoofer:
- Size/Diameter: These are usually given in inches (e.g., 8″, 10″, 12″, 15″) since there are many standard sizes available. Choose one that is of suitable size; it should fit in your space and offer the desired output as well as low-frequency extension.
- Power Handling: Concerning power handling, this refers to the greatest amount of power that can be controlled by a subwoofer either in terms of continuous (RMS) power or peak/maximum power. Make sure that your amplifier has more than enough power to drive the subwoofer effectively.
- Sensitivity (SPL): Decibels (dB) determine sensitivity ratings, which show how well a subwoofer turns input power into sound output. The higher values denote louder sounds for the same energy used up
- Mounting Depth: The mounting depth or enclosure total required depth is an important consideration especially when dealing with applications in vehicles where space may be limited.
Having known what constitutes a good subwoofer for you, next is coming up with how to make a subwoofer enclosure. Let us now move on to the design phase.
Designing the Subwoofer Enclosure
Once you have your subwoofer, the next step is to decide on what design will be best for the enclosure. It’s at this point where the real art and science of constructing a subwoofer box or making a sub-box comes into play.
These are some important factors that should be considered when designing enclosures for subwoofers:
Box Volume: The size inside an enclosure is a very important factor that determines its performance. For any given subwoofer driver some specific calculations and formulas can help in determining this optimum internal volume.
The type of enclosure: As previously indicated, sound quality and output from the subwoofer depend on whether it is sealed, ported, or bandpass. So make sure you select the right type of enclosure.
Port Design: For ported enclosures, system tuning as well as optimization of low-frequency response depends on various aspects such as size, length, and placement of the port(s).
Material Selection: The overall rigidity, resonance and acoustic properties associated with the design may vary depending on the construction materials employed i.e. wood, MDF (medium-density fiberboard), or strengthened composites.
Various online calculators and software tools can help you with these design considerations on how to make a subwoofer enclosure. These resources are capable of providing the necessary calculations, recommendations, and design templates so that your box is built for outstanding performance.
Additionally, several subwoofer manufacturers provide detailed driver designs and recommendations which simplify the process of building an optimized enclosure for their particular model. Once you have settled on a design for your enclosure, construction begins.
Discover the Best 10 Inch Subwoofers for Mind-Blowing Bass
How to Make a Subwoofer Enclosure
Now that everything has been done on paper, it’s time to put your hands into the physical construction of the subwoofer enclosure. This phase is where all the sparks fly in this project; it provides you with an opportunity to test your DIY skills practically.
Here’s how to build a sub woofer box step by step:
- Assemble Required Equipment: Tools such as circular saws (circular saw or jigsaw), power drill or driver, wood glue, MDF screws or plywood screws, and damping materials, if required, are included in this category.
- Do the measurements and trim the cabinet panels: Make certain that your design plan is followed by meticulously taking measurements and trimming specific panels that will form the enclosure. Ascertain that all of them are of the right size and square.
- Bring together the Enclosure: Start by spreading out panels onto which wood glue and screws are used to hold them into position. The alignment as well as structural soundness should be kept in mind when assembling it. For ported designs, cut out and install the port opening(s) according to design.
- Put in place Damping Materials: To eliminate undesired vibrations and resonances, make sure you have put some damping materials like sound deadening mats or even acoustic foam on the inside walls of this box.
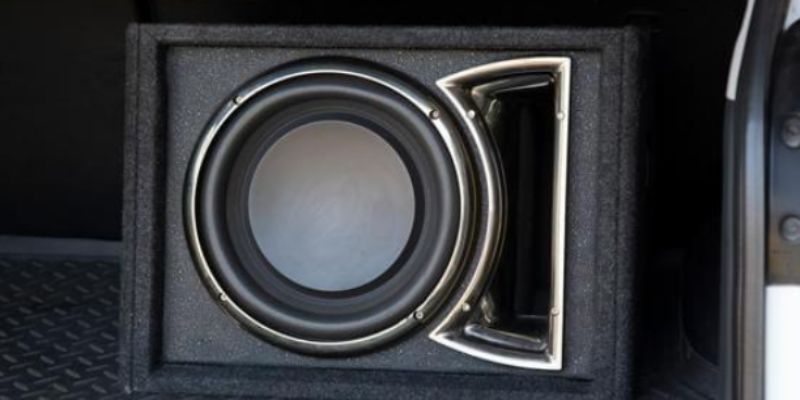
- Fix Subwoofer: Carefully mount your subwoofer driver on the front baffle of the enclosure ensuring a tight seal with no gaps.
- Etch Enclosure: You may want to protect it using a layer, cover its exterior with vinyl or carpet material, or simply expose its bare wood finish depending on what best works for you.
- Complete Last Inspections: Conduct further checks on your finished enclosure to see if there are any holes, air leakage, or other structural problems so that you can correct them for easy fitting and solidly built unit
Pay close heed to the details throughout construction and take your time to get a high-quality professional-looking subwoofer enclosure. End up with a custom-built enclosure that will enhance the performance of your subwoofer to levels you have never seen before if you are patient enough and pay attention to the minutest aspects.
Tuning and Optimizing the Subwoofer Enclosure
Having built your subwoofer enclosure, now it’s time to fine-tune the system for optimal performance. This is where you can unleash the full potential of your personally designed setup.
Here are some crucial steps in achieving perfect sound:
- Adjust Port Size and Length: For ported enclosures, the port(s) size and length play a critical role in controlling low-frequency response. Try different port configurations until you find one that achieves good output, extension, and tightness at once.
- Use Damping Materials: Put strategically placed damping materials inside the enclosure like acoustic foam or mass-loaded vinyl. This helps reduce unwanted resonances and vibrations which results in a better defined low end.
- Integrate Your Audio System with Subwoofer: Correctly connect the subwoofer to your amplifier or receiver and set up the crossover settings for perfect blending of other audio elements. Do adjustments on the volume of a subwoofer to attain equilibrium.
- Experiment on Where to Position Your Subwoofer: The physical placement of the subwoofer enclosure can have a significant impact on the overall bass performance. Try different positions within the room, or vehicle, to find out where it works best.
- Measure and Analyze: Use either sound level meter or specialized analyzing software for your audio system in order to measure its frequency response curve. This will help you identify any problem areas or opportunities for further tuning and optimization.
- Make Adjustments and Repeat: Based on your measurements and listening tests, make any necessary adjustments to the enclosure, port, damping, or system integration. Repeat this process until you’re completely satisfied with how it sounds.
Best 12 Inch Subwoofer: Top 9 Picks Revealed!
The tuning process is iterative; therefore, do not rush; allow yourself time for experiments until you achieve that perfect sound output you are after always remember it is possible at times things may turn out quite different from what we expected sometimes using trial methods just trust your ears – ultimately our aim is an audio experience that resonates deeply with both yourself and those who listen alongside you.
Advanced Subwoofer Enclosure Techniques
This will benefit true sound enthusiasts and DIY people, with subwoofer enclosures being full of advanced techniques and possibilities. The following covers the more complex ones which can as well be very rewarding when the right decisions are made concerning how to make a subwoofer enclosure.
Ported vs Sealed Enclosure: As mentioned before in this article, the choice between having a ported (vented) or sealed enclosure can significantly affect the performance of the subwoofer. Ported enclosures generally provide higher output and deeper bass extension while sealed enclosures yield tighter low-end control. However, experimenting with both design options will help you find that perfect balance for your specific needs.
Building A Bandpass Enclosure: Bandpass enclosures combine characteristics of both sealed and ported designs to optimize the desired frequencies targeted by a particular enclosure. These enclosures require more complex designing and building processes but when done correctly they produce great sound with high output levels in the chosen lower frequency range.
Incorporating Multiple Subwoofers: Adding multiple subwoofers into an enclosure helps those who are interested in having an even stronger low-end response. This allows greater power handling, higher output, and the ability to fine-tune the low-frequency sound to your specific preferences.
Advanced Materials and Techniques: Other than the standard wood and MDF construction, you can consider employing different exotic materials such as reinforced composites, which will make enclosures that are more rigid and have better resonance control and acoustic properties. Other advanced building techniques that could be employed in design practice include CNC machining and 3D printing which to some extent broaden the vision towards designing.
Advanced Electronics Integration: For hi-tech music enthusiasts, incorporating advanced electronic elements such as digital signal processors (DSPs), active crossovers, and equalization filters into your subwoofer system can change everything. Using these instruments, you would have a wide range of options for low-frequency sound which is at par with professional standards.
Looking at it this way, making a subwoofer enclosure is an expansive and intriguing subject matter, where there is always a lot of space for innovation, testing ideas, and self-expression. No matter if you are new to this or an experienced audiophile there is always one more thing to know about perfecting low-end sound quality.
Safety And Maintenance Considerations
Before we conclude our comprehensive guide on how to make a subwoofer enclosure it’s important to discuss some key safety considerations and maintenance issues. Therefore for safe use and proper operation of your subwoofer system is of the utmost importance.
To avoid overheating and causing damage to the subwoofer driver, good ventilation and cooling are required for subwoofers especially high-powered ones that generate a lot of heat during operation.
Handling the Subwoofer with Care: Moisture, excessive vibrations, and impacts can easily ruin subwoofers because they are very fragile components. When installing subwoofers or using them normally, take precautionary measures such as locking them in place to ensure that their drivers do not get damaged.
The Enclosure’s Upkeep: If you own one, you should not leave your enclosure unattended. This will involve looking at any signs of wear and tear on your boxes, any air leaks available in the system, and tightening hardware periodically. To keep it functioning for longer periods while maintaining its performance levels check out your subwoofer cabinets regularly.
Matching Power And Amplification Well: It is important that the amplifier’s power handling capacity and impedance match up well with those of the subwoofer. For safety reasons, when operating a loudspeaker, apply just the right wattage without exceeding the power ratings of this speaker.
Adherence to Local Regulations and Guidelines: Depending on where you are located and whether it is a home audio or in-vehicle system, there may be local regulations or guidelines governing the installation and use of subwoofer systems. Take time to research and comply with such rules.
By giving preference to these safety and maintenance considerations, you will enjoy using your custom-made subwoofer enclosure knowing that your audio system is operating under safe conditions.
Conclusion: Raise Your Audio Experience through a Magnificent Subwoofer Enclosure
Congrats! Now you completely know how to build a custom subwoofer box that can take your audio system up a notch. No matter if you are building one for your home theater, car audio setup, or professional sound system; this guide has outlined principles and techniques that make a great foundation for any project.
Bear in mind that a well-designed subwoofer enclosure requires knowledge of the basics, careful design planning, and execution as well as attention to construction details. You are almost there to create a custom-built enclosure with refined bass sound, unmatched audio quality, and total immersion in sound by following the procedures I have mentioned.
So, what are you waiting for? This guide on how to make a subwoofer enclosure that will take your sound system to another place. With the right know-how, tools of trade, and an imaginative mind you can unleash all that your subwoofer is capable of doing and elevate your listening experience beyond imaginable boundaries.
Also read:
Best 15 Inch Subwoofer – Top 8 Picks You Should Consider
How to Add a Subwoofer to a Car in 6 Simple Pro Steps

Kenny Owen is an acclaimed audio expert and longtime enthusiast with a deep passion for sound technology. With over 15 years of experience in the car and home audio industry, Kenny has established himself as a trusted authority on everything from speaker setups and amplifier configurations to the latest audio equipment and innovations.
Through his engaging writing style and meticulously researched articles, Kenny shares his vast knowledge on optimizing audio systems for superior sound quality. He provides in-depth tips and tricks for achieving the best listening experience, whether it’s tuning a car’s audio system for an immersive musical journey or creating a high-fidelity home theater setup. Additionally, Kenny’s comprehensive buying guides empower readers to make informed decisions when investing in audio components, ensuring they get the most bang for their buck.
