Adding an auxiliary battery to power amplifiers, subwoofers, and other intensive car audio components prevents dimming lights and distorted sound. With the right techniques, wiring a dedicated audio battery is straightforward. This guide covers how to install a car audio battery, including selecting the ideal battery and integrating it to provide robust power and take your car sound system to the next level.
Introduction to Installing Auxiliary Car Audio Batteries
Standard vehicle batteries often struggle to deliver steady voltage when driving multiple amps, subwoofers and other power-hungry gear. The benefits of adding a secondary battery include:
- Prevents lights dimming when bass hits hard at high volumes
- Provides steady voltage to amps, avoiding signal clipping and distortion
- Supplies abundant extra current for additional speakers, accessories and electronics
- Serves as an emergency jump starter if your starting battery fails
While requiring careful installation, a secondary battery specifically for audio use takes strain off your vehicle’s electrical system.
Choosing an Appropriate Car Audio Battery
Consider the following when selecting an auxiliary battery:
- Deep cycle type – Withstand repeated discharges better than standard batteries
- High reserve capacity – Provides steady voltage under heavy loads
- 800+ cold cranking amps – Allows emergency starting capability if ever needed
- 50+ Ah capacity – More amp-hours means more potential power
- Physical size – Ensure the battery fits your vehicle’s allotted mounting space
Match the amp battery to expected system power demands for optimal performance.
Where to Mount the Audio Battery in a Vehicle
Typical battery mounting locations around a vehicle include:
- Trunk – Most common spot offering ample room and ventilation
- Under rear seat – Keeps battery securely inside the cabin
- Pickup bed – Requires a protective enclosure for exposed mounting
- Spare tire well – Utilizes existing underfloor holding space
- Engine bay – Requires extensive heat and moisture protection
Choose a location close to any rear amplifiers with some airflow.
How to Install a Car Audio Battery – Wiring the Auxiliary Battery
Follow these steps when wiring your amp battery:
- Mount the battery securely to prevent shifting using an anchored bracket.
- Connect the negative terminal to vehicle chassis using 4 AWG ground cable.
- Run 4 AWG positive cable from battery through fuse to amplifiers.
- Install high current ANL fuse block on positive cable within 18 inches of battery terminal.
- Use ring terminals and heat shrink at all connections for durability.
Robust, properly fused cable protects the battery and electrical system.
Integrating the Battery with Your Vehicle’s Electrical System
The key steps are:
- Connect negative battery terminal directly to the chassis ground.
- Link positive terminals using small fused 4 AWG wire.
- Install large high current ANL fuse on the link between positive terminals.
- Attach isolator between positive terminals to isolate batteries while allowing charging from the alternator.
With this layout, both batteries receive charging current while remaining protected from each other.
Selecting and Wiring an Isolator
An isolator is crucial for dual battery setups. It charges both batteries while isolating them to prevent current flowing between the batteries. Follow this wiring:
- Select an isolator rated at least 10-20 amps higher than your alternator output.
- Install the isolator near both batteries to allow short cable runs.
- Connect the isolator input lead to the alternator’s positive output.
- Attach the isolator’s two output leads to the aux and starting battery positives.
The isolator now allows both batteries to charge safely while keeping them isolated.
Verifying Appropriate Wire Gauge
Use the following minimum wire gauges based on total system power:
- 500W systems – 8 AWG copper wire for power cabling
- 1000W systems – 4 AWG copper wire
- 1500W+ systems – 2 AWG or larger copper wire
Bigger wire allows sufficient current flow over longer cable runs minimizing voltage drop.
Protecting the Wiring from Damage
Take precautions when routing cables:
- Use grommets when passing through metal barriers to avoid shearing.
- Avoid running cables near hot exhaust components.
- Properly secure wires along their route to prevent chafing.
- Separate and shield all signal carrying wires from power cables.
Properly installed wiring delivers clean, noise-free power from the battery to the amplifiers.
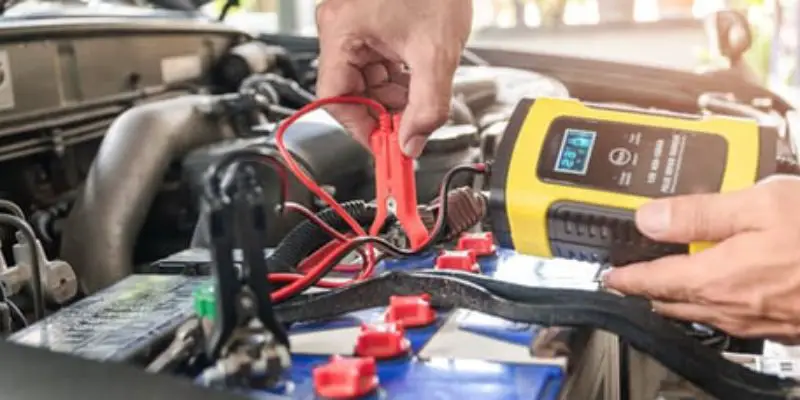
Periodically Charging Both Batteries
When the engine is off, you’ll need to parallel charge both batteries:
- Disconnect the main positive link between the batteries.
- Connect charger leads to the positive and negative terminals of either battery.
- Turn on the charger. Current flows across both batteries until fully charged.
- When finished charging, reconnect the main positive link between batteries.
This equalizes both batteries, extending their lifespan.
Troubleshooting Battery Draining Too Quickly
If your amp battery drains excessively fast, check for:
- Short circuit in the wiring – Inspect all cabling for damage.
- Fuse too large for system – Install correctly rated fuse.
- Isolator failure – Test isolator functionality and replace if needed.
- Excessive system power demand – Reduce volume/use. Upgrade alternator and cabling.
- Defective battery – Test battery capacity load testing and replace if weak.
With the right amp battery powering a properly designed system, battery life is maximized.
Conclusion
Adding an auxiliary battery dedicated to high current car audio components provides clean, steady power that prevents dimming lights and distorted output. By selecting the appropriate battery, wiring it safely with correct cabling and fusing, and integrating with the vehicle’s electrical system via an isolator, the audio battery effectively powers your amps and speakers. Periodically charging both batteries and troubleshooting any high drain issues ensures your audio battery provides power for ultimate sound quality.
Also read:
Best Car Battery for Car Audio – Top 4 Reviews

Kenny Owen is an acclaimed audio expert and longtime enthusiast with a deep passion for sound technology. With over 15 years of experience in the car and home audio industry, Kenny has established himself as a trusted authority on everything from speaker setups and amplifier configurations to the latest audio equipment and innovations.
Through his engaging writing style and meticulously researched articles, Kenny shares his vast knowledge on optimizing audio systems for superior sound quality. He provides in-depth tips and tricks for achieving the best listening experience, whether it’s tuning a car’s audio system for an immersive musical journey or creating a high-fidelity home theater setup. Additionally, Kenny’s comprehensive buying guides empower readers to make informed decisions when investing in audio components, ensuring they get the most bang for their buck.
