Car subwoofers can provide powerful bass for your music at home, but installing them properly requires some technical know-how. In this comprehensive guide, I’ll walk you through the entire process of setting up car subwoofers in your house – from planning and purchasing equipment to the hands-on installation.
I’ve been installing car audio systems, including subwoofers, for both vehicles and homes for over 15 years. My goal is to help you achieve thumping low-end sounds safely and effectively. I’ll share tips I’ve learned from experiences helping countless customers, so you can avoid common mistakes. By following my step-by-step instructions on how to hook car subwoofers up in a house, even DIY newbies can get their home subwoofer system up and running right.
Planning Your Home Subwoofer System
The first step is deciding what equipment you need. Consider the size of the space you want bass to fill and your music preferences. Bigger room? You may need more power and larger subwoofers. Hip hop and EDM fan? A powerful sub will suit your tastes.
Choosing Subwoofers
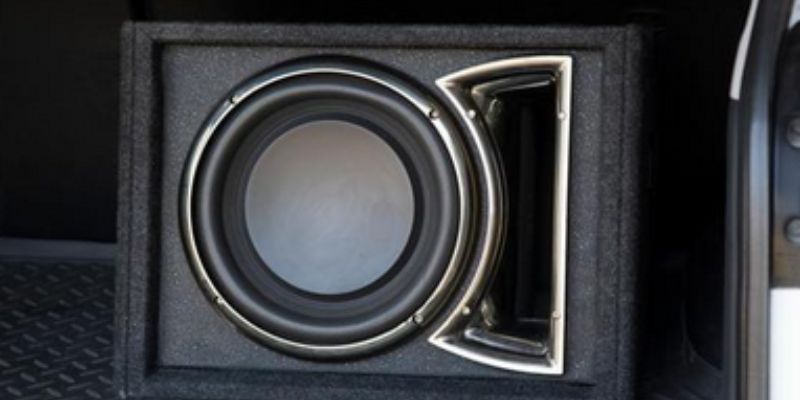
For a small to medium home theater or living room, one 10-inch subwoofer rated 150-300 watts is usually enough. Larger spaces may require two 10-inch or one 12-inch sub-rated 300-500 watts each. Always match the wattage rating of your amp (see below) to your subwoofer’s maximum power handling.
Choosing an Amplifier
You’ll need a dedicated subwoofer amplifier (amp) to power your sub(s). Monoblock amps provide a dedicated channel for the sub. A 500-750 watt amp is usually sufficient for one 10-inch sub, bump it up to 800-1000w for two subs or one 12-inch subwoofer.
Tip: consider an amp with adjustable low-pass crossover settings, so you can tune it for the smoothest integration with your speakers.
Choosing Speakers
While not required, adding a bookshelf or in-wall speakers provides full-range music. A quality AV receiver or integrated amp powers the speakers. Consider your other components too like Blu-ray or streaming components for an all-in-one home theater system.
With your equipment chosen, it’s time to map out installing it!
Subwoofer Installation Plan
Before removing any existing equipment or making holes, take time to envision and sketch your installation plan. Consider:
- Subwoofer location: against an exterior wall under a window works well. Avoid inside corners for reduced standing waves.
- Amplifier location: centrally located equipment rack or hardware closet. Run power and speaker wire before mounting.
- Speaker locations: either in-wall mounted or bookshelf style near TV/projector is common.
- Wire routing: plan paths for power/speaker wire that avoid obstructions and pesky cable clutter. Mark intended paths.
Having a clear plan will make installation smoother and minimize unexpected complications. Don’t rush – careful planning pays off.
Hands-On Installation
With equipment purchased and a plan mapped, it’s time to get installed! Let me walk you through the key steps:
Step 1 – Mount the Subwoofer
Choose a sturdy mounting location. I like mounting subs inside wall studs using heavy-duty subwoofer brackets. Alternately, construct a sturdy plywood platform. Secure with lag bolts.
Step 2 – Run Power Wiring
Run a 12-gauge power wire from a dedicated 20-amp wall circuit to the amp location. Then from amp to subwoofer. Include an in-line fuse within 18 inches of the power source for safety.
Tip: use wire staples/cable clips to safely secure power wires every 18-24 inches, especially near doors/floors.
Step 3 – Amp Installation
Mount your amplifier in the planned location. Connect power wires, ensuring the power switch is off. Follow the amplifier manual for speaker terminal polarity/connections.
Step 4 – Speaker Wire Runs
Run 12-18 gauge speaker wire from fronts/center/surrounds to receiver and from amplifier to subwoofer. Leave 6-12 inches of excess for trimming.
Tip: use wire strippers to cleanly remove insulation without damaging copper. Twist tight connections.
Step 5 – Connections and Testing
With all wiring complete, you’re ready for the moment of truth. Power everything on slowly in stages to avoid voltage spikes. Start music playing and adjust the subwoofer level/EQ/phase first before integrating the mains. Troubleshoot as needed. Enjoy!
Step 6 – Finishing Touches
Use silicone/caulk to seal wire holes. Label all speaker destinations clearly. Keep your installation manual handy for future reference or modifications. Consider protective grille covers too if needed.
With any installation, issues can arise. But by following these steps and taking your time, your home should now be bumpin’ with big bass!
Tuning and Maintenance for Perfect Bass
Even after successful installation, some fine-tuning may be needed to achieve perfectly balanced, distortion-free low frequencies throughout your space. Here are my top tips:
Set Proper Crossover Settings
The crossover allows the sub to seamlessly blend with your speakers. Start with 80-120Hz to let your speakers handle higher bass and mids cleanly. Adjust higher/lower as needed.
Calibrate Levels Properly
Use test tones/programs and an SPL meter to match sub-output to mains within 3dB for a seamless frequency range handoff. Adjust the phase if needed for the smoothest response.
Optimize Subwoofer Placement
Moving the sub just a few inches can significantly impact response. Experiment with positioning for the strongest, most evenly dispersed bass throughout your primary seating area.
Consider Acoustic Treatment
For larger spaces, absorption panels against problem wall/ceiling surfaces can reduce unwanted standing waves for clearer, tighter bass articulation. Roxul Safe n’ Sound is a popular and effective studio-grade absorption material.
Maintain Your System
Periodically check all connections are tight. Vacuum subwoofer ports/vents. Amp vents should remain clear too for proper cooling. Test occasionally with test tones. Repair/replace as needed to maximize lifespan.
With some simple adjustments and TLC, your home subwoofer system can deliver pro-level low-end enjoyment for years to come! Let me know if you have any other questions along the way.
Common Subwoofer Installation Problems and Solutions
Even with careful planning and execution, issues can still arise. Unresolved, they detract from your listening experience. Here are some typical problems encountered and solutions:
Muddy, Boomy or Uncontrolled bass
Improper sub-placement near walls/corners is likely the culprit. Experiment with positioning as discussed earlier. Adjust the crossover point and consider room treatment too.
Uneven Response around the Room
Related to the above, try moving the sub or adding a second sub in an opposing location. Messes with standing waves for balanced output anywhere.
Distortion at High Volumes
The subwoofer being overdriven. Reduce gain/level until clean. Or upgrade to a more powerful amp/subwoofer if consistently pushing limits.
Buzzing or Humming Noise
Check amplifier/power and signal cable connections are tight and clean. May need to rearrange the equipment location or add ferrite cores to signal cables.
One Channel Weaker Than Other
Swap speaker wire polarity on the sub to pinpoint if wired wrong or if the voice coil is defective in that channel. Might need repair/replacement.
No bass, weird noise, or no power
Methodically check each component, starting at the pre-amp output, signal cables, amp power/protection status, and sub-cone/suspension for issues. Process of elimination.
With experience, most problems can be solved! As a last resort, consult with a pro installer for a fresh set of ears/eyes on stubborn issues. With minor troubleshooting, you can get back to musical bliss in no time.
How to Hook Car Subwoofers Up In A House – FAQs
Can I use car subwoofers in my house?
Yes, car subwoofers can work well in home audio setups. You’ll need a dedicated amplifier to power them and ensure proper wiring and ventilation.
How do you power an active car subwoofer at home?
An active subwoofer that includes its internal amplifier just requires a standard speaker wire connection to your main home audio system. No additional amp is needed.
How do I put subs in my room?
You’ll need to securely mount and bolt down the subwoofer, run power and speaker wire, and then set up the sub-level and crossover point through your home audio receiver or amplifier.
Can I use a car amplifier in my house?
Yes, a car amplifier can be used with some considerations like ensuring it receives stable household power and has adequate cooling in its new location.
What power supply do I need to use a car amp in my house?
A car amp needs a dedicated 120-volt household circuit capable of handling the amp’s full power output, usually a 20-amp circuit wired with a 12-gauge cable is best.
How to install a car amp at home?
Mount the amplified safely, run power and speaker cables, connect properly observe polarity, then tune levels and crossovers from your home audio control center.
Where should you not put a subwoofer?
Subwoofers generally perform poorly when installed in a corner, against two walls as this can exaggerate low-frequency response problems like standing waves or bass boosting in some areas of the room.
Can I connect car speakers to a home amplifier?
Yes, car speakers can be powered by a home amplifier. Ensure the home amp can supply enough power for the speakers and that the wiring can handle the increased voltage.
Where is the best place to put a subwoofer in your house?
The best spots are usually against an exterior wall, in an open area, or a central location away from corners to minimize unwanted standing waves or bass response issues in a room.
Summary and Final Thoughts
From the initial planning stages through installation, setup, tuning, and troubleshooting, I’ve shared the full knowledge I’ve accumulated through years of helping countless customers with their home audio projects.
Most importantly, I wanted to ensure I addressed all the “what if” scenarios and questions that often arise when attempting such an installation myself. It never fails that something unexpected comes up, so I aimed to cover as many common problems, challenges, and remedies as possible based on the issues I routinely see in the field. Following these steps should have you avoiding many of those pitfalls.
At the beginning of any DIY project, it’s easy to get excited and want to rush right into the hands-on part. But as I’ve learned through experience, taking the time for careful planning makes an enormous difference in the result. Layout your wiring plans, and equipment locations and check your existing or planned electrical configuration first. This avoids costly mistakes or incomplete systems down the road.
And though it may seem self-evident, safety should always come first when working with any AC power. Make sure to follow electrical codes and use proper gauge wiring, fusing, and mounting techniques when installing a car amplifier designed for 12-volt DC into a 120-volt home. A small investment in safety now protects your entire investment and avoids potential catastrophe.
Once everything is hooked up and started, even the best-laid plans can still require some final sound calibration and room tuning to achieve that picture-perfect bass response everywhere in the space. But taking measurements, adjusting settings systematically, and experimenting with sub-placement will get you there. The rewards of deep, accurate low-frequencies throughout your home are certainly worth the effort.
Whether you use a single 10-inch powered sub or a pair of 12-inch monsters powered by beefy monoblocks, a well-implemented car subwoofer home audio system can deliver performance exceeding many all-in-one offerings for a fraction of the cost – if installed correctly. I sincerely hope this extensive guide has provided you with all the knowledge, planning help, and reassurance needed to complete your home theater subwoofer upgrade with confidence and enjoy it for many movie nights and parties to come!
Let me know if any other questions come up down the road. I look forward to helping audio enthusiasts improve their systems for years of listening pleasure. Now go and get those subs thumping in your house!

Kenny Owen is an acclaimed audio expert and longtime enthusiast with a deep passion for sound technology. With over 15 years of experience in the car and home audio industry, Kenny has established himself as a trusted authority on everything from speaker setups and amplifier configurations to the latest audio equipment and innovations.
Through his engaging writing style and meticulously researched articles, Kenny shares his vast knowledge on optimizing audio systems for superior sound quality. He provides in-depth tips and tricks for achieving the best listening experience, whether it’s tuning a car’s audio system for an immersive musical journey or creating a high-fidelity home theater setup. Additionally, Kenny’s comprehensive buying guides empower readers to make informed decisions when investing in audio components, ensuring they get the most bang for their buck.
