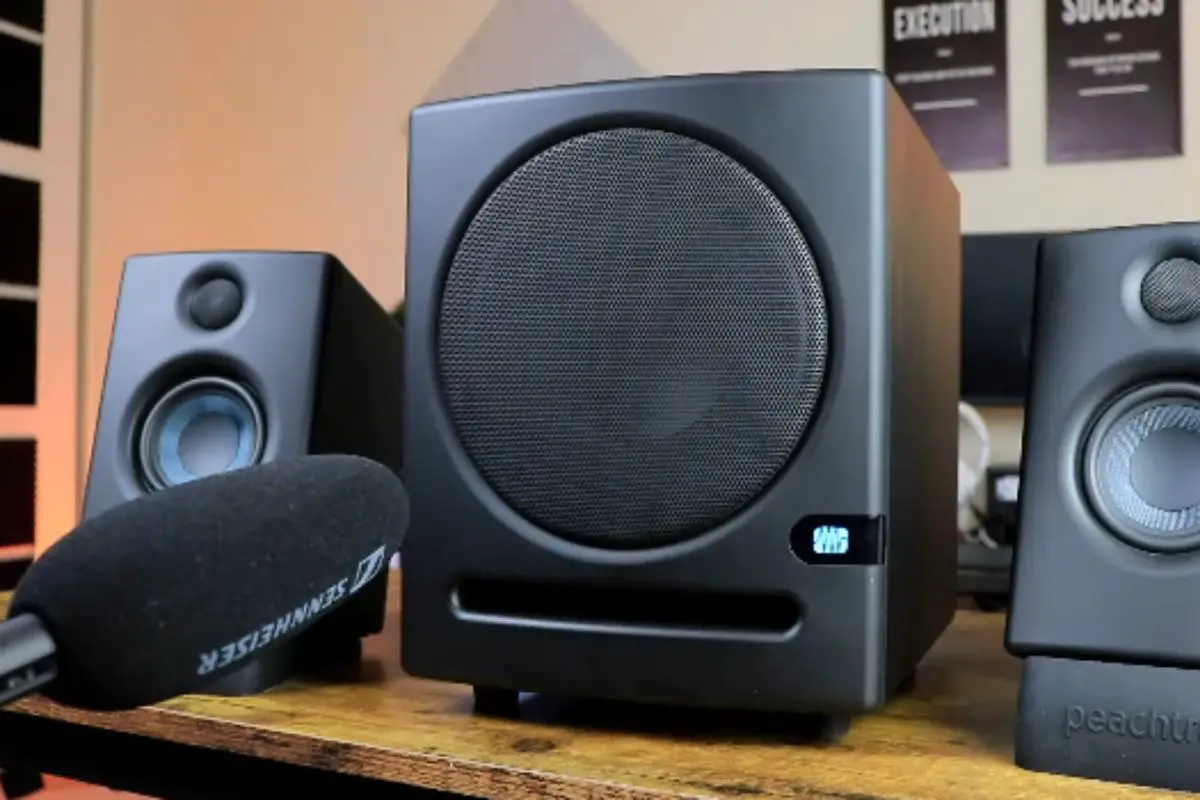
Adding a subwoofer to your studio monitor setup can take your audio mixing capabilities to the next level. With deeper and richer bass reproduction, you’ll be able to hear the full frequency spectrum and make mixes that translate beautifully across sound systems.
However, properly integrating a subwoofer does require some care. In this comprehensive guide, I’ll cover everything you need to know – from subwoofer placement to wiring options to gain staging. Follow these best practices on how to connect a subwoofer to studio monitors and you’ll enjoy greater low-end accuracy and a more immersive listening experience.
Why Add a Studio Subwoofer?
While studio monitors are designed to deliver flat, honest sound for mixing and mastering, most compact models have limitations in their low-frequency extension. This is simply physics in action – the smaller the driver size, the less low-end it can reproduce.
A subwoofer dedicated to the lowest frequencies relieves studio monitors of trying to extend undesirably low. This allows the monitors to focus on the mids and highs. With a sub filling out the bottom end, you’ll reap several benefits:
- Full-range Frequency Reproduction – Hear deep bass on your mixes that smaller monitors can’t produce. This allows you to make mixing decisions on the full spectrum.
- Improved Mix Translation – Subwoofers allow you to hear how your mix will sound on systems that produce deep bass frequencies, ensuring your mix decisions translate well across different playback systems.
- Enhanced Acoustic Treatment – Proper subwoofer integration improves the accuracy of the monitors. Without struggling to reproduce ultra-low frequencies, their output interacts cleanly with the room.
- Immersive Experience – Deep, powerful bass just feels good! The additional low end makes listening more enjoyable and inspiring.
For the most accurate mixing environment, a subwoofer is a highly recommended addition.
Subwoofer Designs for Studio Use
Studio subwoofers are specially designed for smooth, even bass reproduction. Options include:
- Front-Firing – Provide tight, punchy bass good for mixing. Require being placed away from walls.
- Down-Firing – Deliver warm, dispersed bass by firing at the floor. Can be placed in corners.
- Passive Radiator – Use an unpowered diaphragm rather than a port, providing rich low end. Great for smaller rooms.
- Powered vs. Passive – Powered subs have a built-in amplifier. Unpowered (passive) requires an external amp. Powered subs integrate more easily with monitors.
Key features to look for include adjustable crossover, volume, and polarity controls. These give you the tuning ability to seamlessly blend with monitors.
Optimal Subwoofer Placement
Proper subwoofer placement is critical for smooth, accurate bass. Here are placement tips:
- Position the subwoofer close to your listening position for the best integration with the monitors. Starting with corner placement often provides the fullest bass response as boundary walls reinforce low frequencies.
- Avoid placing right against a wall. Leaving a foot or more of breathing room allows cleaner, tighter bass production.
- Experiment with positioning around the listening area. Walk around and listen for the spot with the smoothest response where bass frequencies don’t rapidly drop off.
- Use bass traps or absorption panels around the subwoofer to tame reflections and improve transient response. This will tighten up the bass accuracy.
- For stereo subwoofers, spacing evenly across the front soundstage provides greater imaging and reduces peaks and nulls.
Taking the time to find the optimal sub location will pay off with enhanced low-frequency mixing capabilities.
How to Connect a Subwoofer to Studio Monitors – Wiring Options
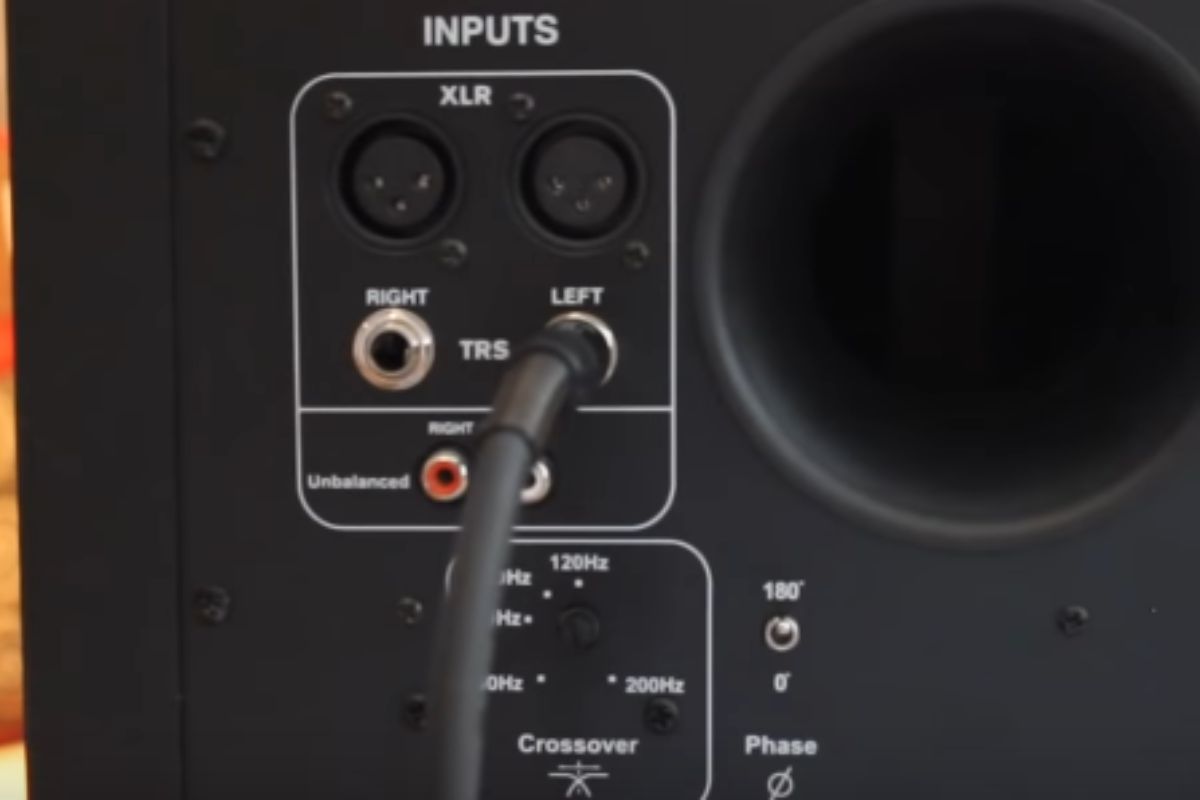
Connecting your subwoofer properly ensures clean, low-noise signal transfer. Here are some wiring options to integrate with monitors:
1. Interface Subwoofer Output
If your audio interface provides an RCA or balanced subwoofer output, this provides the most direct connection option. Simply run a cable from the interface output to the input on your subwoofer. The interface handles the bass management crossover.
2. Through Powered Monitors
Alternatively, you can wire the subwoofer through powered monitor outputs. Run balanced TRS or XLR cables from your interface’s monitor outputs to the powered monitor inputs. Then connect the subwoofer output from the monitors to the subwoofer input.
This method requires setting the high-pass filter on monitors to create a crossover, preventing low frequencies from reaching the monitors. Set the crossover point below the monitor’s low-frequency limit.
3. Through a Mixer
Connecting through a small monitor mixer or controller provides enhanced control. Run cables from interface monitor outputs to mixer line inputs. Connect monitors to mixer outputs, and subwoofer to the mixer’s sub out. Use the mixer’s bass management to set the crossover point.
A mixer provides greater flexibility if you expand your monitoring system in the future.
Gain Staging for Optimal Levels
Properly setting the gain ensures clean signal transfer without noise or distortion. Here is an effective gain staging approach:
- Start by setting your audio interface’s monitor outputs at 50% volume.
- Next, play pink noise and gradually increase monitor input gain until the sound is clean and undistorted.
- Play program audio with heavy bass content. Slowly raise the subwoofer volume until it blends seamlessly with the monitors.
- Fine-tune crossover, subwoofer placement, and acoustic treatment until you achieve a cohesive blend.
Getting the gain right as well as a balanced crossover between the sub and monitors is key for ideal translation.
Mixing Tips for Studio Subwoofers
It takes time to adjust to a new subwoofer – rely on these tips for the best results:
- Resist overdoing subwoofer volume. While exciting at first, too much deep bass can make your mixes muddy. Let the sub fill out the low end naturally.
- Focus on the mids when making mix decisions. Get these frequencies clear and balanced, as they are most essential to the mix.
- Use reference tracks to check your mix in the context of commercial releases. This is more important than obsessively soloing bass frequencies.
- Take breaks and check your mix on different systems. Car stereo, headphones, earbuds, etc. Provide perspective.
- Don’t rule out moving your subwoofer around occasionally. Positional needs can change over time acoustically.
With these mixing practices, your subwoofer can help you achieve more accurate, balanced mixes that translate beautifully across sound systems.
Conclusion
Adding a quality subwoofer to your studio setup can take your mixing skills to the next level. With comprehensive frequency reproduction down to 20Hz and below, you’ll be able to make informed mix decisions with confidence.
Following proper placement, gain staging, and crossover setting best practices, you can achieve seamless integration between your monitors and sub. The result is a more complete representation of your mix. Simply get it right by following this guide on how to connect a subwoofer to studio monitors.
While it takes some fine tuning, with patience and practice your studio will become an immersive sonic environment. So enhance your monitoring capability and enjoy the full frequency spectrum with the addition of a studio subwoofer.
Related Posts:
Best Budget Studio Monitors – Top 10 Picks Revealed
Discover the Best 10 Inch Subwoofers for Mind-Blowing Bass
Best 8 Inch Subwoofer Reviews: Unleash Thunderous Bass!
Best Underseat Subwoofer for Car – Top 8 Reviews

Kenny Owen is an acclaimed audio expert and longtime enthusiast with a deep passion for sound technology. With over 15 years of experience in the car and home audio industry, Kenny has established himself as a trusted authority on everything from speaker setups and amplifier configurations to the latest audio equipment and innovations.
Through his engaging writing style and meticulously researched articles, Kenny shares his vast knowledge on optimizing audio systems for superior sound quality. He provides in-depth tips and tricks for achieving the best listening experience, whether it’s tuning a car’s audio system for an immersive musical journey or creating a high-fidelity home theater setup. Additionally, Kenny’s comprehensive buying guides empower readers to make informed decisions when investing in audio components, ensuring they get the most bang for their buck.
