As an experienced automotive technician, one of the most common upgrades I see customers request is installing an upgraded sound system in their vehicle. In particular, many ask about how to wire component speakers to 4 channel amp to take advantage of the crisp, detailed sound they provide. However, the wiring process can seem intimidating if you’ve never tackled a car audio installation before.
In this guide, I wanted to share my expertise to help demystify the process and give you confidence to complete this upgrade yourself. By following some basic safety practices and methodical steps, you’ll be cruising down the road with impressive sound quality in no time. We’ll cover the key components needed, proper preparation, and walk through connecting everything from the amplifier to the speakers. With the right information and planning, wiring component speakers to a 4-channel amp is totally doable.
Let’s look into each facet of the process in thorough detail. From component selection to crossover tuning, I’ll walk you through best practices gained straight from the installer bay. With the proper information and diligent work, you’ll soon be rocking your own killer car audio system.
Understanding Component Speakers and 4-Channel Amps
Component speaker systems have been a staple of high-end mobile audio for decades, and for good reason. By separating tweeters, midranges, and woofers into individual enclosures constructed for their dedicated frequency range, these speakers can reproduce sound with accuracy difficult for coaxial designs to match.
Best Car Amplifier for Bass – Top 10 Picks
Each driver type requires an enclosure tailored to its parameters. Tweeters perform best in small sealed pods or mounted surface-style on solid material like the A-pillar or dash. This close proximity positions them at ear level for an intimate high-frequency experience. Midranges then take over the mid-bass and midrange octaves, housed in slightly larger sealed enclosures usually found in factory speaker locations.
When it comes to low-frequency playback, woofers face a unique challenge in a vehicle compared to home audio. Rather than large sealed or ported enclosures, they must fit behind the grille wherever space allows. To maintain ample bass despite size constraints, an enclosure needs careful engineering. Proper bracing and stuffing with damping material helps maximize output from a limited internal volume. High-powered drivers paired with a stout sealed box are a dependable combination.
With each speaker optimized for its frequency band, a capable amplifier takes over distributing tailored power. Enter the 4-channel amplifier, an essential component in any dedicated component system. Earlier car audio amp designs offered limited channels, but 4-channel solutions have long been the standard for component flexibility. Their ability to independently power all major speaker types is what makes a true active setup possible.
Preparing for Installation
Before starting any electrical work, safety is paramount. I always begin an audio installation by disconnecting the vehicle’s negative battery terminal to avoid accidental shorts during the process. Battery power supplies enough voltage to damage sensitive electronics or even cause injury, so take proper precautions.
Once isolated, assess the vehicle’s layout and consider potential amplifier locations. While dashboard-mounted amps look slick, areas under the front seats or in the rear cargo area usually provide better airflow and protection from weather elements. Always mount on a flat, solid surface away from pedals or moving linkages. Review manufacturer instructions beforehand as well – improper installation can void the warranty.
With an amplifier location chosen, plan cable and component placements accordingly. Measure wire lengths carefully to avoid nasty tangles or excess during installation. Speaker, power, and signal wire all require dedicated runs, so mapping routes beforehand is a must. Zip-ties are handy for securing cables out of the way without over-tightening bare conductors.
Best 8 Inch Subwoofer Reviews: Unleash Thunderous Bass!
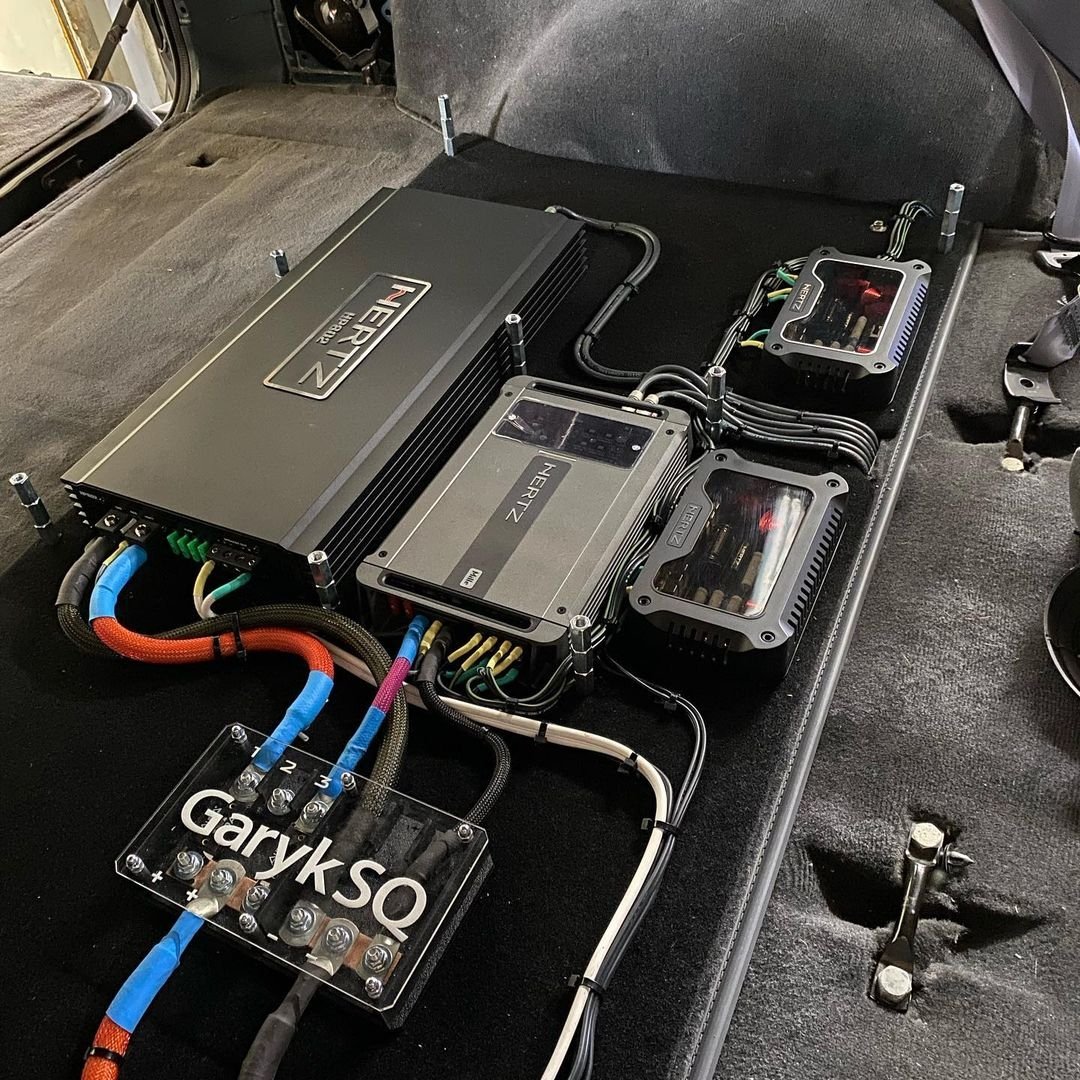
Some installs may also involve creating a grounding distribution block to minimize resistance throughout the system. By bonding multiple ground wires together via the block soldered directly to chassis metal, noise can be reduced compared to individual grounds on each component. A distribution block takes more planning but improves sound quality significantly in the right applications.
Finally, assemble a comprehensive set of hand tools suited for automotive work. Having the right crimping pliers, wire strippers, utility knives, crimp connectors, and other basics on-hand prevents wasted trips to the hardware store mid-job. A voltmeter for testing, terminals and blade fuses for protection also cannot be overlooked. Thorough preparation is half the battle when tackling any electronics installation.
Gathering Tools
For crimping copper speaker wire, quality ratcheting crimp pliers topped my must-have list through years of install experience. I swear by models from Knipex, which feature replaceable jaws for gripping various connector sizes with consistent precision. Slip the bare wire end fully into the connector before crimping with just enough pressure for a gas-tight hold. Too little and connections risk failure over time, too much risks splitting the conductor.
To prepare different gauge wire ends, carrying assorted Wireman brand strippers proved indispensable. These feature multiple openings sized for household wire up to 10AWG plus dodger tips for fine automotive cables. Always strip no more than 5/16 inch of insulation for a proper crimp termination – too much exposed copper risks shorting.
Making neat and uniform cuts in cable sheathing calls for a sharp 18V reciprocating saw with fine-tooth metal cutting blade. I find cordless models far more maneuverable than corded in tight vehicle compartments. Handle all blades carefully per manufacturer safety instructions. Always wear gloves and glasses when slicing insulation for protection.
These power tools streamline preparatory tasks, but smaller hand tools remain invaluable on install jobs too. Needlenose pliers for tucking wires, utility knives for trimming zip-ties, screwdrivers, nut drivers, and socket wrenches all get regular use finishing connections and hardware securely. Carrying a fully equipped install toolkit, from heavy-duty scissors to Torx bits, prepares me to complete projects efficiently with minimal trips to the shop for missing items. Preparation truly is the key to any successful installation!
Wiring the Amplifier
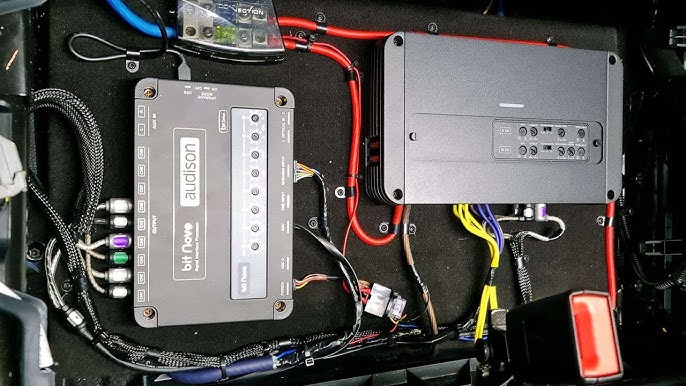
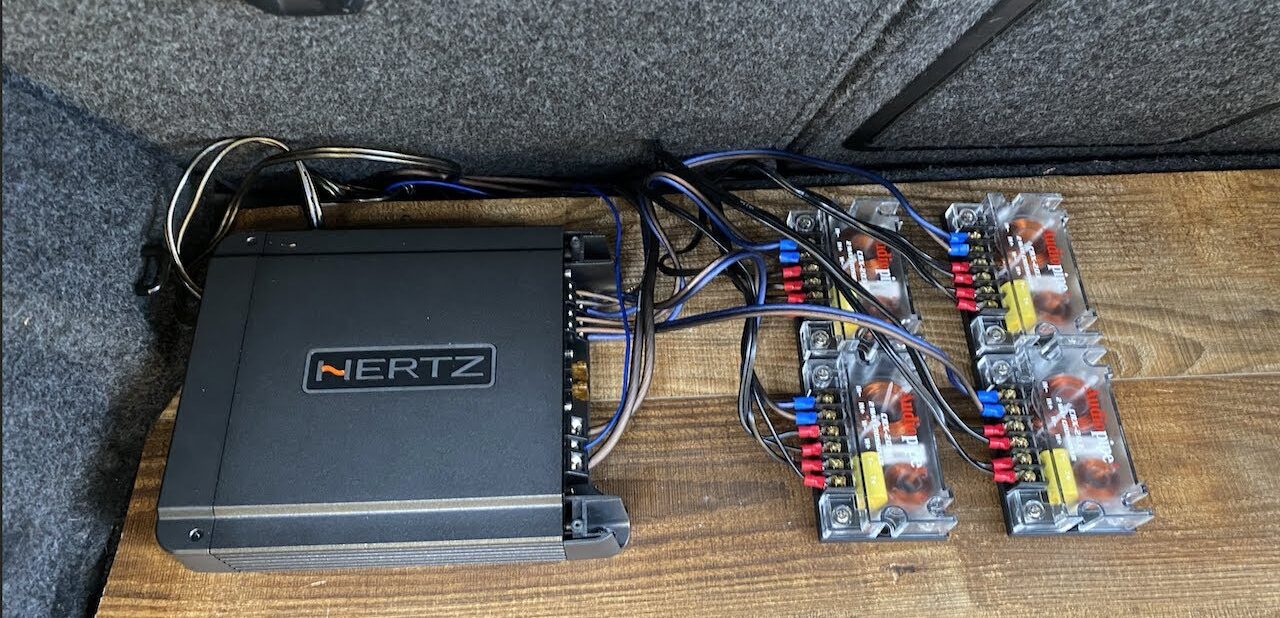
Now it’s finally time to get hands-on running power and signal wires to the new amplifier. I always start by bringing the positive battery cable through a protective grommet into the designated amplifier bay. From there, a distribution block simplifies connections if running multiple power wires like for additional amplifiers down the line. Directly to the block goes the primary power cable terminated with an ANL fuseholder for safety. This feeds each component off low-resistance bus bars.
When it comes to grounding, I preach securing the amplifier chassis directly to bare metal chassis for lowest resistance path possible. After prepping the ground point by wire brushing away undercoating, I like to bolt on a grounding plate between techflex braided sheathing and terminated lugs. Applying noalox anti-oxidizing paste helps protect connections in harsh under-hood elements. Proper grounding provides the complete power circuit backbone required for faultless performance.
Signal cables carry high-quality RCA connectors but still require care. I cut each stripped end back just past the conductor’s insulation and tin the exposed strands with solder for optimum contact surface inside the connector body. This preparationbonds wire firmly without risk of fraying or breakage over vibration. Heatshrink applied afterwards seals and protects the joint. Clean work like this preserves fidelity over the life of the system.
Remote turn-on signals don’t carry audio but their reliability proves just as critical. Sourcing from a switched 12V terminal ensures the amplifier powers on only when the radio does to avoid parasitic battery drain. I strip back just enough insulation from the amplifier’s remote turn-on wire to fit inside a factory harness plug or suitable installation-specific connector for a professional factory fit. Every detail matters in a competition-worthy system!
The final consideration is speaker-level input wiring should full-range preouts prove unavailable. By tapping factory speaker wires before crossovers, all frequency bands can still be amplified independently. Correct polarity matches amplified signals to avoid distortion. Proper planning and execution delivers pristine music wherever roads may lead. Let’s now connect those speakers!
How To Wire Component Speakers To 4 Channel Amp
When it comes to integrating speakers, taking time with installation pays off in the listening. I like to start by running individual speaker cables through protective conduit into designated door, kick panel, and parcel shelf locations. This prevents chafing over time. Terminating each conductor calls for heatshrink insulation applied past soldered crimp connections to form bulletproof joints.
Identifying positive and negative terminals remains crucial. Some manufacturers label or color code, but I always perform voltage tests as a checkpoint. With power off, a digital multimeter probes wires back at the amplifier while an assistant connects the other end to verify. Positive reads nominal system voltage like 14.4V, while negative shows zero ohms of resistance to chassis ground. This non-destructive testing builds confidence before amplification!
Now comes the fun part – hooking speakers up to customized amp channels. I match color-coded or labeled wires between amp terminals and drivers based on schematics. Double checking polarity prevents issues later. Having an extra set of hands proves handy squeezing into tight quarters too. With all mechanical connections complete, protective terminals cover bare wire ends at each speaker.
Best 6.5 Car Speakers- Top 10 Picks and Reviews
Time also deserves spent tweaking crossovers to extract speakers’ full abilities. My personal vehicles get non-destructive tested to characterize drivers before final settings. For example, finding midrange upper limits through frequency sweeps helps set crossover points at the driver’s mechanical limit rather than guessing. Subtle EQ and time alignment refinements further tailor response to my exact vehicles. Performance exceeds stock plus!
Clients rarely have test equipment, so I aim front stage settings as a starting point based on published parameters. Slight adjustments often improve blending after listening. Striving to eliminate resonances puts my years learning speakers’ idiosyncrasies to good use. The reward becomes buttery smooth transitions across an orchestra of installed playback. Attention to nuanced acoustic tuning elevates even budget builds!
Additional Considerations
With equipment connected, the final frontier involves positioning each driver for best sound. I preach Doppler-effect tweaking – very slight adjustments making big differences through phase interactions. For example, inching a tweeter outward an eighth inch brought clarity like never before on one install. Phase trackers help identify problem frequencies solved through repositioning or equalizing. Truly dialing in a system involves these nuanced tuning touches.
Proper amplifier settings complete the sonic puzzle. While capable of serious power, 4-channel amps require gains set conservatively to protect delicate speakers. I use test tones from a analyzer tool or noise track played through the system to calibrate each output for a nominal 1V input. Residual noise disappears and headroom opens up when not overdriving circuitry. Fine-tuning establishes the effortless dynamics clients expect.
Some installations encounter noise issues no testing foresaw. Ground loops between audio and charging systems prove common culprits, mitigated through quality line conditioners or specialized RCA cables. As a last resort, a distribution block isolates grounds between amplified and battery ground references. These field solutions cure problems to deliver OEM-level noise floors. Attention to even minor details separates great installs from merely functional ones.
The listening experience picks up where wiring leaves off. Through countless trial-and-error speaker placements over the years, I’ve learned subtle positioning produces outsized sonic rewards. Staging, for example, blossoms by aiming tweets just past the A-pillar inside vehicle primary reflections. Tilting mounts by mere degrees adjusts dispersion to spread ambient ambiance. Truly dialing in a system requires open-minded experimentation and ears highly trained to nuanced changes. Perfection becomes an enlightening goal never fully attained yet eternally worthwhile pursuing.
Conclusion
Whether you DIY or hire a pro, I hope this guide imparts the deep passion, care, and expertise that elevates an audio system beyond a simple install into a true soundtrack to adventures on the open road. Years learning from experience have shown that taking one’s time with planning, installation, and fine-tuning pays massive dividends in the final result. Achieving a great component speaker, 4-channel amplifier setup represents far more than parts on paper – it’s an journey through craft, troubleshooting, and endless refinement that makes for memories to last lifetimes. Now get out there and start rocking your new ride with passion!
FAQs on How to Wire Component Speakers to 4 Channel Amp
How to hook up component speakers to an amp?
Connect the positive and negative terminals of each speaker to the corresponding positive and negative output on the amplifier channels. Ensure polarity is correct to avoid issues.
How many speakers can I wire to a 4-channel amp?
A standard 4-channel amp can power up to 4 speakers, or you can use 2 channels for front speakers and the other 2 for rear. Some amps also have a dedicated subwoofer channel.
Is an amplifier necessary for component speakers?
While not required, an amplifier is highly recommended for component speakers to provide the necessary power and equalization that these speakers need to perform at their best.
How to hook up a 4-channel amp to a factory stereo?
Run RCA cables from the factory head unit’s pre-amp outputs to the amp’s RCA inputs. Alternatively, tap speaker wires if the head unit lacks pre-outs and connect to the amp’s speaker level inputs.
How to wire a 4 channel amp to 4 speakers and a sub
Use one channel each for the front and rear speakers. Dedicate the remaining channel and a line output for the subwoofer and its own amplifier.
How to wire 4 speakers and 2 tweeters to 4 channel amp
Assign a channel each to the front and rear speakers. Combine the tweeters and midranges as a set, then connect them to one channel using a passive crossover.
How to hook up a 4 channel amp to front and rear speakers
Connect the front speakers to channels 1 & 2 and the rear speakers to channels 3 & 4 of the amplifier. Ensure the polarity of all wire connections is kept consistent.

Kenny Owen is an acclaimed audio expert and longtime enthusiast with a deep passion for sound technology. With over 15 years of experience in the car and home audio industry, Kenny has established himself as a trusted authority on everything from speaker setups and amplifier configurations to the latest audio equipment and innovations.
Through his engaging writing style and meticulously researched articles, Kenny shares his vast knowledge on optimizing audio systems for superior sound quality. He provides in-depth tips and tricks for achieving the best listening experience, whether it’s tuning a car’s audio system for an immersive musical journey or creating a high-fidelity home theater setup. Additionally, Kenny’s comprehensive buying guides empower readers to make informed decisions when investing in audio components, ensuring they get the most bang for their buck.