
As a professional car audio installer with over a decade of experience, I’ve seen firsthand the transformative power of upgrading from a single DIN to a double DIN head unit. Have you ever wished for a larger, more feature-rich display in your vehicle’s dashboard? If so, you’re in the right place. This guide will walk you through the process of how to convert single din to double din unit, opening up a world of enhanced functionality and improved user experience.
Whether you’re a DIY enthusiast looking to tackle your first car audio project or a novice seeking to understand the conversion process, this article is tailored for you. We’ll explore the benefits of upgrading, provide a detailed step-by-step installation guide, and address common challenges you might face along the way.
By upgrading to a double DIN head unit, you’ll enjoy advantages such as a larger touchscreen display, improved navigation capabilities, enhanced connectivity options, and often better sound quality. Let’s get started and discover how to breathe new life into your vehicle’s infotainment system by converting your single DIN to a double DIN.
Understanding Single DIN and Double DIN Stereo Units
Before we get into the nitty-gritty of the conversion process, it’s crucial to understand the differences between single DIN and double DIN units.
What is Single DIN?
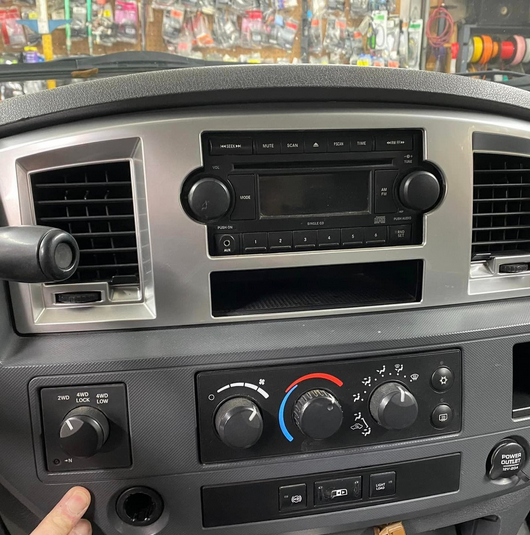
Single DIN (Deutsche Industrie Norm) is the standard size for car stereos, measuring approximately 2 inches (50mm) in height and 7 inches (180mm) in width. These units are compact and have been the industry standard for decades. Typical features of single DIN units include:
- Basic radio functionality
- CD player (in many models)
- Small display for showing track information
- Limited touchscreen capabilities (if any)
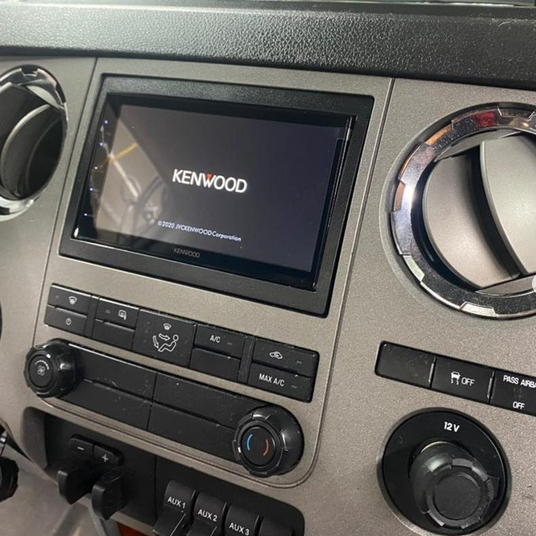
What is Double DIN?
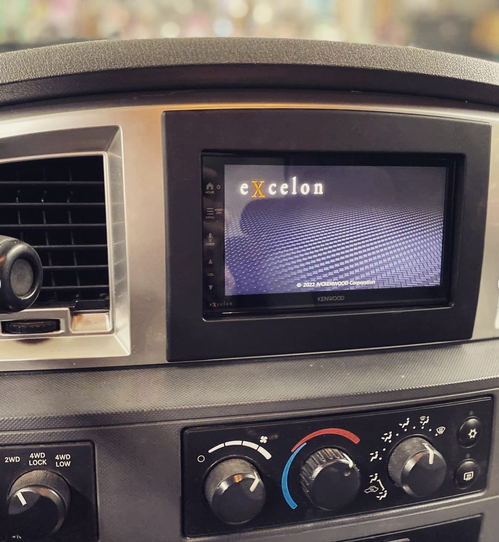
Double DIN units are essentially twice the height of single DIN units, measuring about 4 inches (100mm) in height while maintaining the same 7-inch width. This larger form factor allows for:
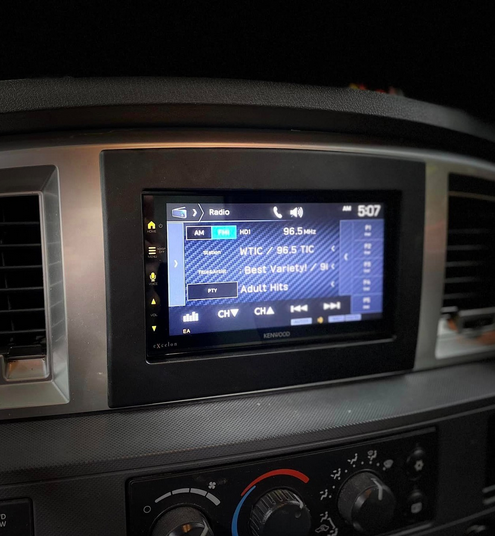
- Larger touchscreen displays (typically 6.2 to 7 inches)
- Advanced navigation systems
- Backup camera integration
- Apple CarPlay and Android Auto compatibility
- Enhanced audio controls and equalizer settings
Assessing Your Car’s Dashboard
Before proceeding with the conversion, it’s crucial to assess your vehicle’s dashboard to ensure compatibility with a double DIN unit. In my years of working on various car models, I’ve learned that not all vehicles are suitable for this upgrade without significant modifications.
Start by examining the area around your current single DIN stereo. Look for:
- Available space above or below the existing unit
- The presence of climate control buttons or other controls that might interfere
- The overall shape and design of the dashboard
Some vehicles have a single DIN stereo with a storage pocket or other features above or below it, which can often be removed to accommodate a double DIN unit. However, in other cases, you may need to consider more extensive modifications or even opt for a custom dash kit.
Necessary Equipment and Tools
Based on my experience, having the right tools and equipment is half the battle when it comes to a successful single DIN to double DIN conversion. Here’s a comprehensive list of what you’ll need:
- Double DIN head unit of your choice
- Vehicle-specific installation kit (dash kit)
- Wiring harness adapter
- Antenna adapter (if required)
- Screwdrivers (flathead and Phillips head)
- Panel removal tools
- Wire strippers and crimpers
- Electrical tape or heat shrink tubing
- Multimeter (for troubleshooting)
- Zip ties for cable management
- Steering wheel control interface (if applicable)
Optional but recommended:
- Soldering iron and solder (for more secure wire connections)
- Plastic trim tools (to avoid scratching your dashboard)
How to Convert Single Din to Double Din – Step-by-Step Installation Guide
Now that we have all our tools and equipment ready, let’s get into the installation process. Remember, safety should always be your top priority when working on your vehicle’s electrical systems.
Step 1: Disconnect the Battery
Before you start any work, disconnect the negative terminal of your car’s battery. This step is crucial to prevent any short circuits or electrical damage during the installation process. I’ve seen firsthand the problems that can arise from skipping this simple but essential step.
Step 2: Removing the Single DIN Head Unit
- Start by removing any trim panels surrounding the stereo. Use plastic trim tools to avoid scratching the dashboard.
- Locate and remove the mounting screws holding the single DIN unit in place. These are usually found on the sides or top of the unit.
- Carefully slide out the old head unit, being mindful of any wires connected to it.
- Disconnect the wiring harness, antenna cable, and any other connections from the back of the unit.
Step 3: Installing the Dash Kit
- Unpack your vehicle-specific dash kit. This kit typically includes a faceplate and mounting brackets.
- Assemble the dash kit according to the manufacturer’s instructions. This usually involves attaching the side brackets to the main faceplate.
- Test-fit the assembled dash kit into your vehicle’s dashboard to ensure a proper fit. Make any necessary adjustments.
- Once you’re satisfied with the fit, secure the dash kit in place using the provided screws or clips.
Step 4: Connecting the Wiring Harness
The wiring harness is crucial for connecting your new double DIN unit to your vehicle’s electrical system. Here’s how to proceed:
- Match the wires on your vehicle’s harness to the corresponding wires on the new head unit’s harness. Color codes are usually standardized, but it’s always best to double-check with your vehicle’s wiring diagram.
- Connect matching wires using crimp connectors or by soldering and using heat shrink tubing. I prefer soldering for a more secure and long-lasting connection.
- Pay special attention to power wires (constant 12V, switched 12V), ground, and speaker wires.
- If your vehicle has steering wheel controls, connect the appropriate wires to the steering wheel control interface.
Step 5: Installing the Double DIN Head Unit
- Connect the wiring harness to the back of your new double DIN head unit.
- Attach the antenna adapter if required.
- If you’re installing a backup camera, connect it now following the manufacturer’s instructions.
- Carefully slide the new head unit into the dash kit, ensuring no wires are pinched or strained.
- Secure the head unit using the provided screws or mounting mechanisms.
Step 6: Reconnecting the Battery and Testing
- Double-check all your connections to ensure they’re secure.
- Reconnect the negative terminal of your car’s battery.
- Turn on your vehicle and test the new head unit. Check all functions, including radio, Bluetooth, touchscreen responsiveness, and steering wheel controls (if applicable).
- If everything is working correctly, reassemble any trim pieces you removed earlier.
Best Car Battery for Car Audio – Top 4 Reviews
Additional Features and Considerations
Installing a Rearview Camera
A rearview camera is an excellent safety feature that many double DIN units support. Here’s a quick guide on adding one:
- Choose a compatible rearview camera.
- Mount the camera near your license plate or in another suitable location.
- Run the camera’s video cable to your head unit, typically alongside existing wiring harnesses.
- Connect the camera to a reverse light for power (it will turn on when you shift into reverse).
- Configure your head unit to display the camera feed when in reverse gear.
Steering Wheel Controls
Maintaining your steering wheel control functionality is crucial for safe driving. If your vehicle has steering wheel controls:
- Purchase a compatible steering wheel control interface.
- Connect it between your vehicle’s wiring and the new head unit.
- Program the interface according to the manufacturer’s instructions, which usually involves pressing each steering wheel button in a specific sequence.
Customizing Your Double DIN Head Unit
Modern double DIN units offer a wealth of customization options. Take time to explore:
- Sound settings: Adjust equalizer settings, fader, and balance for optimal audio quality.
- Display settings: Customize the theme, brightness, and layout of your head unit’s interface.
- Bluetooth pairing: Connect your smartphone for hands-free calling and music streaming.
- Navigation settings: If your unit has built-in navigation, update maps and set your preferences.
Troubleshooting Common Issues
Even with careful installation, you might encounter some issues. Here are some common problems and their solutions:
- Head unit not powering on:
- Check all power connections, especially the constant 12V and switched 12V wires.
- Verify that the ground wire is securely connected to a clean metal surface.
- Display problems:
- Ensure the display cable is properly connected.
- Check for any protective film on the screen that needs to be removed.
- Sound issues:
- Verify all speaker connections.
- Check audio settings, including fade and balance controls.
- Steering wheel controls not working:
- Double-check the connections to the steering wheel control interface.
- Ensure the interface is properly programmed for your vehicle and head unit.
- Backup camera not displaying:
- Check the camera’s power connection to the reverse light.
- Verify the video cable is securely connected to the head unit.
Conclusion
Converting your single DIN to a double DIN head unit is a rewarding project that can significantly enhance your in-car entertainment and functionality. By following this guide, you should be well-equipped to tackle the conversion process. Remember, patience is key, and taking your time to ensure proper connections will save you headaches down the road.
If at any point you feel overwhelmed or encounter issues you can’t resolve, don’t hesitate to seek professional help. Many car audio shops offer installation services and can assist with troubleshooting.
For further information and support, consider joining online car audio forums or consulting video tutorials specific to your vehicle make and model. These resources can provide valuable insights and tips from other enthusiasts who have completed similar conversions.
Upgrading to a double DIN unit opens up a world of possibilities for your vehicle’s infotainment system. Whether you’re looking for improved navigation, better sound quality, or enhanced connectivity, this upgrade is a fantastic way to breathe new life into your daily drive. Happy installing!
Best 12 Inch Subwoofer: Top 9 Picks Revealed!
Best 8 Inch Subwoofer Reviews: Unleash Thunderous Bass!
FAQs on How to Convert Single Din to Double Din
Can you change a single DIN to double-DIN?
Yes, in many vehicles, it’s possible to convert a single DIN stereo to a double DIN unit. This typically involves using a vehicle-specific installation kit and may require some modifications to the dashboard. However, not all vehicles have the space or compatibility for this upgrade, so it’s important to check your specific car model before attempting the conversion.
Is a double-DIN better than single DIN?
Double DIN units generally offer more features and a larger display than single DIN units, making them better for many users. They typically include touchscreens, advanced navigation systems, and better integration with smartphones. However, the “better” choice depends on your specific needs and your vehicle’s compatibility.
What is the difference between DIN 1 and DIN 2?
DIN 1 (single DIN) and DIN 2 (double DIN) differ primarily in their size. A single DIN unit is about 2 inches tall, while a double DIN is approximately 4 inches tall, with both having the same width of about 7 inches. This size difference allows double DIN units to accommodate larger screens and more features.
Are single DIN radios universal?
While single DIN radios adhere to a standard size, they are not entirely universal. The mounting methods and wiring can vary between vehicle makes and models. However, with the right mounting kit and wiring harness adapter, most single DIN radios can be installed in a wide range of vehicles.
What does double DIN stand for?
Double DIN stands for Double Deutsche Industrie Norm, referring to a standardized size for car stereos. The term “double” indicates that it’s twice the height of a single DIN unit, allowing for larger displays and more features in the same dashboard space.
Do all double DIN radios fit?
Not all double DIN radios fit in every vehicle, even if the vehicle has a double DIN opening. While the size is standardized, variations in dashboard design, mounting methods, and wiring can affect compatibility. It’s crucial to check your specific vehicle model and use the appropriate installation kit when upgrading to a double DIN unit.
The Ultimate Guide to Car Amplifier Installation – Unleash Your Car’s Audio Potential

Kenny Owen is an acclaimed audio expert and longtime enthusiast with a deep passion for sound technology. With over 15 years of experience in the car and home audio industry, Kenny has established himself as a trusted authority on everything from speaker setups and amplifier configurations to the latest audio equipment and innovations.
Through his engaging writing style and meticulously researched articles, Kenny shares his vast knowledge on optimizing audio systems for superior sound quality. He provides in-depth tips and tricks for achieving the best listening experience, whether it’s tuning a car’s audio system for an immersive musical journey or creating a high-fidelity home theater setup. Additionally, Kenny’s comprehensive buying guides empower readers to make informed decisions when investing in audio components, ensuring they get the most bang for their buck.