Have you ever found yourself stuck in traffic, wishing your car’s audio system could do more than just play the same old radio stations? As a professional car audio installer with over a decade of experience, I’ve seen firsthand how a simple upgrade can transform a mundane commute into an engaging, entertaining journey. Today, I’m excited to share my insights on the Dual Electronics XVM279BT installation and usage, a versatile in-dash multimedia receiver that’s been a game-changer for many of my clients.
Throughout my career, I’ve installed countless car stereos, but the Dual Electronics XVM279BT stands out for its combination of features, affordability, and user-friendliness. This guide is designed to walk you through everything you need to know about this impressive unit, from understanding its capabilities to maximizing its potential in your vehicle.
Whether you’re a DIY enthusiast looking to tackle your first car audio upgrade or simply curious about what modern in-dash receivers can offer, this comprehensive guide will provide you with valuable insights and practical advice. Let’s dive in and explore why the Dual Electronics XVM279BT might be the perfect addition to your daily drive.
I. Understanding the Dual Electronics XVM279BT
A. Key Features and Specifications
The Dual Electronics XVM279BT is packed with features that cater to the modern driver’s needs. As someone who’s installed and configured this unit numerous times, I can attest to its impressive capabilities:
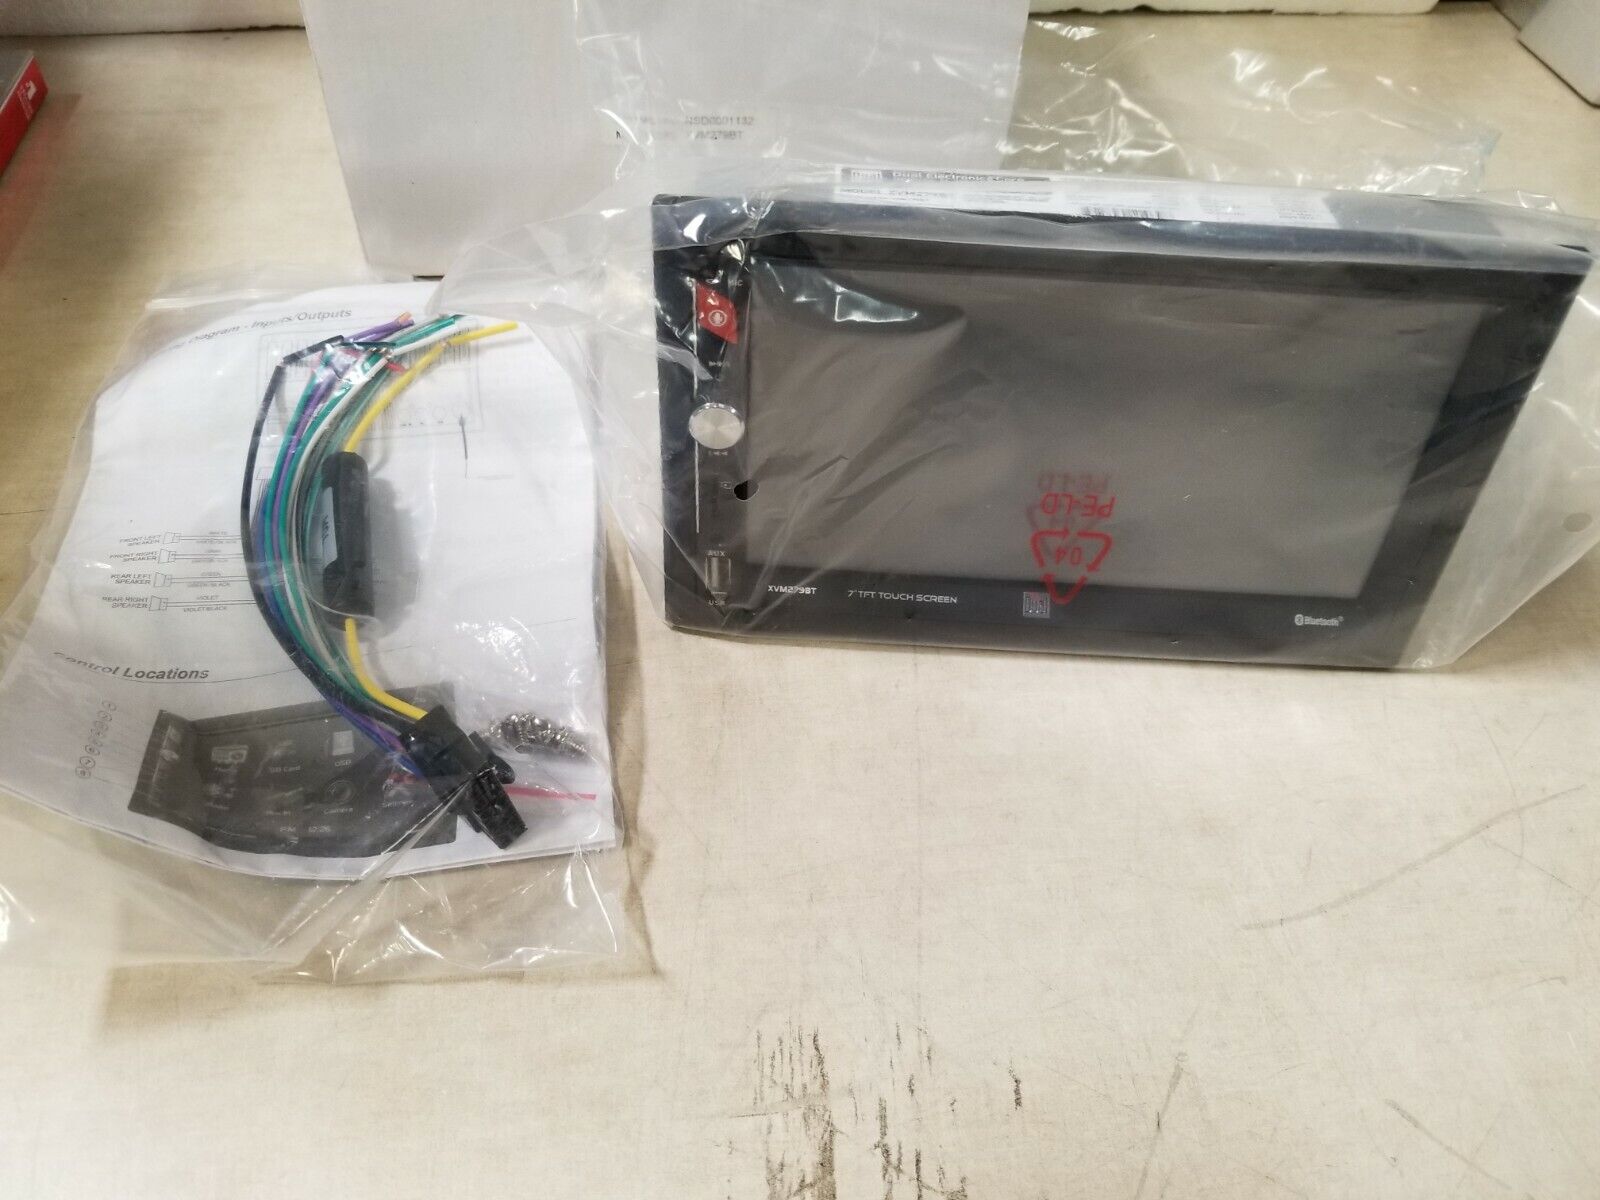
1. 7-inch touchscreen display: The responsive, high-resolution screen is a significant upgrade from older, button-based systems.
2. Apple CarPlay and Android Auto compatibility: This feature has been a game-changer for many of my clients, offering seamless integration with their smartphones.
3. Bluetooth connectivity: Enables hands-free calling and wireless audio streaming.
4. Built-in AM/FM tuner: For those who still enjoy traditional radio.
5. USB and AUX inputs: Allows for easy connection of external devices.
6. Rear camera input: Essential for safety and convenience when reversing.
7. Steering wheel control compatibility: Maintains the functionality of your vehicle’s built-in controls.
Best Double Din Head Unit for the Money – Top 5 Reviews
B. Compatibility with Various Vehicles
One of the most common questions I get from clients is about compatibility. The XVM279BT is designed to fit in most vehicles with a double DIN opening, which is standard in many modern cars. However, it’s always crucial to check your specific vehicle’s compatibility before making a purchase. I’ve successfully installed this unit in a wide range of vehicles, from compact cars to SUVs and even some older models with aftermarket dash kits.
C. Comparison with Similar Models in the Market
While there are many in-dash receivers on the market, the Dual Electronics XVM279BT offers a compelling mix of features at a competitive price point. Compared to higher-end models from brands like Pioneer or Kenwood, the XVM279BT holds its own in terms of core functionality. While it may lack some premium features like built-in navigation or HD Radio, it covers all the essentials that most users need, making it an excellent value proposition.
II. Dual Electronics XVM279BT Installation Process
A. Tools and Materials Needed
Before we dive into the dual electronics xvm279bt installation process, let’s gather the necessary tools and materials. Based on my experience, here’s what you’ll typically need:
1. Screwdrivers (Phillips and flathead)
2. Panel removal tools
3. Wire strippers and crimpers
4. Electrical tape
5. Wiring harness adapter (specific to your vehicle)
6. Dash kit (if required for your vehicle)
7. Antenna adapter (if necessary)
8. Multimeter (for testing connections)
Having these tools on hand before you start will make the installation process much smoother.
B. Step-by-Step Installation Guide
Now, let’s walk through the Dual Electronics XVM279BT installation process:
1. Disconnect the car battery: Safety first! This prevents any short circuits during installation.
2. Remove the old stereo: Use panel removal tools to carefully pry off any trim pieces around the existing stereo. Remove any screws holding the old unit in place and gently pull it out.
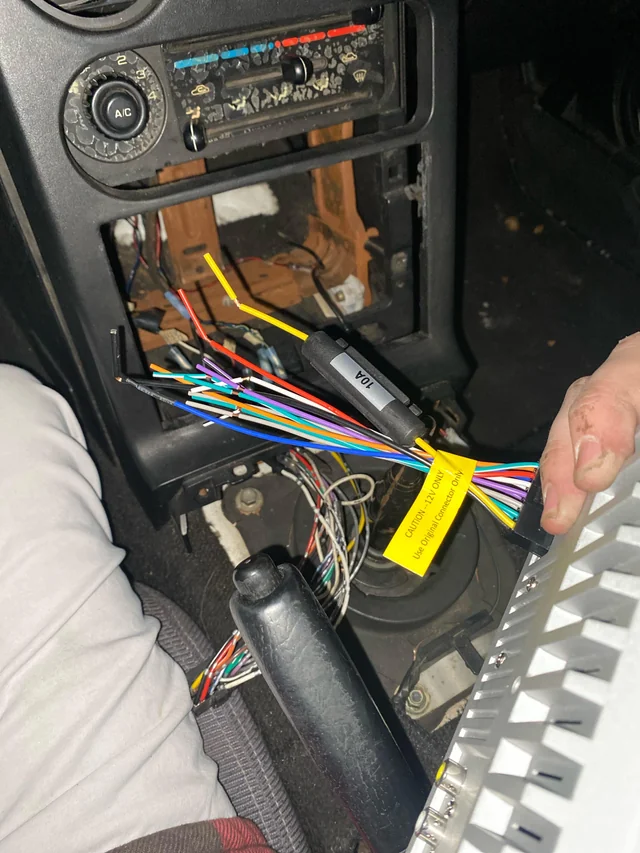
3. Prepare the wiring harness: Connect the XVM279BT’s wiring harness to your vehicle-specific harness adapter. I always recommend soldering these connections for the best reliability, but crimp connectors can work too if you’re not comfortable soldering.
4. Connect the antenna: Attach the antenna adapter if your vehicle requires one.
5. Test the connections: Before fully installing the new unit, reconnect the battery and test all functions to ensure everything is working correctly.
6. Install the dash kit: If your vehicle requires a dash kit, install it now according to the manufacturer’s instructions.
7. Mount the XVM279BT: Carefully slide the new unit into place, ensuring no wires are pinched or strained.
8. Secure the unit: Use the provided mounting brackets or screws to secure the XVM279BT in your dash.
9. Reattach trim pieces: Replace any trim pieces you removed earlier.
10. Final testing: Turn on the ignition and test all functions of the new stereo, including radio reception, Bluetooth connectivity, and touchscreen responsiveness.
C. Common Installation Challenges and Solutions
Throughout my years of installing car audio systems, I’ve encountered various challenges. Here are some common issues you might face during the Dual Electronics XVM279BT installation and how to solve them:
1. Wiring mismatches: Always double-check your wiring diagram. If colors don’t match up, use a multimeter to verify the function of each wire.
2. Tight fit: Some vehicles have limited space behind the dash. In these cases, careful wire management is crucial. Use zip ties to bundle wires neatly.
3. Steering wheel control issues: If your steering wheel controls aren’t working after installation, you may need a separate steering wheel control adapter.
4. Poor radio reception: This can often be solved by ensuring the antenna connection is secure and using a proper antenna adapter if required.
5. Touchscreen alignment: If the touchscreen seems off, you may need to perform a calibration in the settings menu.
III. Setting Up Your XVM279BT
A. Initial Configuration
Once you’ve completed the dual electronics xvm279bt installation, it’s time to set it up for optimal performance. Here’s what I typically do for my clients:
1. Language selection: Choose your preferred language in the settings menu.
2. Time and date: Set the correct time and date for accurate display.
3. Display settings: Adjust brightness and color settings to your preference.
4. Audio settings: Set the initial EQ and balance/fade settings.
B. Bluetooth Pairing Process
Pairing your smartphone with the XVM279BT is straightforward:
1. Enable Bluetooth on your phone.
2. On the XVM279BT, go to the Bluetooth menu and select “Pair New Device.”
3. Select the XVM279BT from your phone’s Bluetooth device list.
4. Confirm the pairing on both devices.
C. Customizing Audio Settings for Optimal Sound
This is where the XVM279BT really shines. I always encourage my clients to experiment with these settings:
1. Equalizer: The unit offers preset EQ curves and a custom option. Start with a preset that matches your music preference, then fine-tune.
2. Balance and Fade: Adjust these to center the sound stage in your preferred listening position.
3. Subwoofer settings: If you have a subwoofer connected, adjust its level and crossover frequency for the best bass response.
4. Loudness: This feature can enhance low-frequency response at lower volumes.
Remember, these settings are subjective and may require some trial and error to find what sounds best to your ears.
IV. Maximizing the XVM279BT’s Features
A. Using the Touchscreen Interface
The 7-inch touchscreen is one of the XVM279BT’s standout features. Here are some tips to make the most of it:
1. Customizable home screen: Arrange icons for your most-used functions for quick access.
2. Gesture controls: Use swipe gestures to navigate menus quickly.
3. Screen dimming: Set up automatic dimming for nighttime driving.
B. Integrating with Smartphones (Apple CarPlay and Android Auto)
This feature has been a game-changer for many of my clients. To use it:
1. Connect your smartphone via USB cable.
2. For Android Auto, you may need to download the app first.
3. Follow the on-screen prompts to set up CarPlay or Android Auto.
4. Use voice commands (Siri or Google Assistant) for hands-free operation.
C. Utilizing the Backup Camera Input
If you’ve installed a backup camera:
1. Connect the camera to the designated input on the XVM279BT.
2. In the settings menu, enable the rear camera option.
3. The display will automatically switch to the camera view when you shift into reverse.
V. Troubleshooting Common Issues
A. Audio Problems and Solutions
1. No sound: Check all connections, especially the speaker wires. Ensure the unit isn’t muted.
2. Distorted sound: Lower the volume and adjust EQ settings. Check for any loose connections.
3. Uneven speaker output: Verify balance and fade settings. Test each speaker individually.
B. Connectivity Issues and Fixes
1. Bluetooth won’t pair: Clear all paired devices and try again. Ensure your phone’s Bluetooth is visible.
2. CarPlay or Android Auto not working: Try a different USB cable. Update your phone’s software.
3. Wi-Fi connection issues: Reset the unit’s network settings and reconnect.
C. Display and Touchscreen Troubleshooting
1. Screen unresponsive: Perform a soft reset by holding the power button.
2. Touchscreen misaligned: Calibrate the screen in the settings menu.
3. Display too dim: Check brightness settings and ensure the dimmer wire is correctly connected.
VI. User Reviews and Experiences
A. Positive Feedback from Users
Throughout my career, I’ve received overwhelmingly positive feedback about the XVM279BT. Users particularly appreciate:
1. The intuitive interface and responsive touchscreen.
2. Seamless integration with smartphones via CarPlay and Android Auto.
3. Improved sound quality compared to factory stereos.
4. The value for money, given the feature set.
B. Common Criticisms and How to Address Them
While the XVM279BT is generally well-received, some users have noted:
1. Boot-up time can be slow: This is common with many multimedia receivers. Patience during startup is key.
2. Limited customization options: While not as customizable as some high-end units, the XVM279BT offers enough options for most users.
3. Occasional software glitches: Keeping the firmware updated usually resolves these issues.
C. Long-Term Reliability Reports
Based on my experience and feedback from long-term users, the XVM279BT has proven to be a reliable unit. Most issues reported are minor and can be resolved with simple troubleshooting. The build quality is solid, and with proper care, many of my clients have enjoyed their units for years without significant problems.
VII. Maintenance and Care Tips
A. Cleaning the Touchscreen and Faceplate
To keep your XVM279BT looking and functioning its best:
1. Use a soft, lint-free cloth to clean the screen. Avoid abrasive materials.
2. For stubborn dirt, use a slightly damp cloth with a mild cleaner designed for electronics.
3. Never spray cleaner directly onto the unit.
B. Updating Firmware and Software
Keeping your XVM279BT up to date is crucial for optimal performance:
1. Check the Dual Electronics website periodically for firmware updates.
2. Follow the provided instructions carefully when updating.
3. Ensure a stable power source during updates to prevent corruption.
C. Protecting Against Theft and Damage
1. Use a detachable faceplate cover when available.
2. Consider a security system for your vehicle if you live in a high-crime area.
3. Park in well-lit areas and avoid leaving valuables visible in your car.
VIII. Accessories and Upgrades
A. Compatible Accessories to Enhance Functionality
To further enhance your XVM279BT:
1. Backup camera: Improves safety and makes parking easier.
2. External amplifier: Boosts sound quality and volume capabilities.
3. Steering wheel control adapter: Maintains the functionality of your vehicle’s built-in controls.
B. Potential Upgrades for Better Performance
For audiophiles looking to take their system to the next level:
1. High-quality speakers: Pair the XVM279BT with premium speakers for better sound reproduction.
2. Subwoofer: Add deep bass to your audio experience.
3. Sound deadening materials: Reduce road noise for a cleaner audio environment.
C. Cost-Benefit Analysis of Additional Investments
While upgrades can enhance your audio experience, it’s important to consider the cost versus benefit:
1. Backup camera: Relatively inexpensive and adds significant value in terms of safety.
2. Speakers: Mid-range upgrades can provide noticeable improvement without breaking the bank.
3. Amplifiers and subwoofers: These represent a more significant investment but can dramatically improve sound quality for enthusiasts.
IX. Conclusion
A. Recap of the XVM279BT’s Strengths and Potential Drawbacks
The Dual Electronics XVM279BT installation process, while detailed, is manageable for many DIY enthusiasts. Its strengths lie in its user-friendly interface, smartphone integration capabilities, and solid sound quality. The few drawbacks, such as occasional slow boot times, are minor compared to the overall value it provides.
B. Final Recommendations for Different User Types
For the average user looking to upgrade their car’s audio system, the XVM279BT offers an excellent balance of features and affordability. It’s particularly well-suited for those who prioritize smartphone integration and touchscreen functionality.
Audiophiles might find it a good starting point, with the potential for further upgrades. However, those seeking the absolute highest-end audio quality might want to explore more premium options.
C. Share Your Experiences
If you’ve installed or used the Dual Electronics XVM279BT, I’d love to hear about your experience. What features do you find most useful? Have you encountered any challenges? Sharing your insights can help others make informed decisions and get the most out of their units.
X. FAQs
A. How does the XVM279BT compare to other Dual Electronics models?
The XVM279BT stands out for its combination of a large touchscreen, smartphone integration, and competitive pricing. While Dual offers models with additional features like built-in navigation, the XVM279BT hits a sweet spot for most users.
B. Can I install the XVM279BT myself, or should I hire a professional?
With patience and basic tools, many car enthusiasts can handle the installation. However, if you’re not comfortable working with car electronics or have a complex vehicle setup, professional installation is recommended.
C. Does the XVM279BT support lossless audio formats?
Yes, the XVM279BT supports various audio formats, including some lossless ones, through its USB input. However, for the best experience with high-quality audio, consider using a dedicated music player app through CarPlay or Android Auto.
D. How long is the warranty on the XVM279BT?
Dual Electronics typically offers a one-year limited warranty on their products. Always check the specific warranty information provided with your unit or on Dual’s website for the most up-to-date details.
E. Can I use the XVM279BT if my car doesn’t have a double DIN slot?
If your car has a single DIN slot, you’ll need a dash kit that converts it to a double DIN opening. These are available for many vehicle models, but it’s essential to check compatibility before purchasing.
In conclusion, the Dual Electronics XVM279BT offers a compelling package for those looking to upgrade their car’s audio system. Its blend of modern features, ease of use, and affordable price point makes it a standout choice in the crowded car audio market. Whether you’re a tech enthusiast or simply looking for a reliable, feature-rich in-dash receiver, the XVM279BT is worth considering. Remember, the key to getting the most out of your new audio system lies in proper installation and setup. Take your time, follow the guidelines, and don’t hesitate to seek professional help if needed. Happy listening!

Kenny Owen is an acclaimed audio expert and longtime enthusiast with a deep passion for sound technology. With over 15 years of experience in the car and home audio industry, Kenny has established himself as a trusted authority on everything from speaker setups and amplifier configurations to the latest audio equipment and innovations.
Through his engaging writing style and meticulously researched articles, Kenny shares his vast knowledge on optimizing audio systems for superior sound quality. He provides in-depth tips and tricks for achieving the best listening experience, whether it’s tuning a car’s audio system for an immersive musical journey or creating a high-fidelity home theater setup. Additionally, Kenny’s comprehensive buying guides empower readers to make informed decisions when investing in audio components, ensuring they get the most bang for their buck.