As a professional car audio installer with over 15 years of experience, I’ve had the pleasure of working with countless stereo systems. Today, I’m excited to share my expertise on the Dual Electronics Stereo DXRM57BT installation. This versatile unit has become increasingly popular among car enthusiasts and casual drivers alike, thanks to its impressive features and affordable price point.
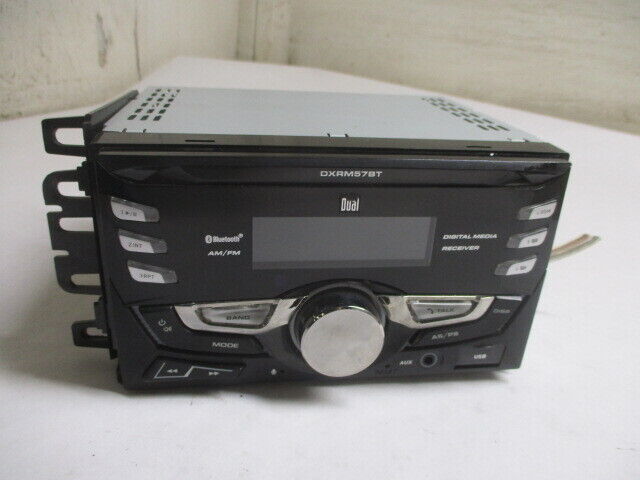
The DXRM57BT is a compact, single-DIN stereo that packs a punch when it comes to functionality. It offers Bluetooth connectivity, USB and auxiliary inputs, and a built-in microphone for hands-free calling. But what truly sets it apart is its ease of installation, which I’ll be guiding you through in this comprehensive article.
Importance of proper installation
I can’t stress enough how crucial proper installation is when it comes to car stereos. Over the years, I’ve seen countless DIY attempts gone wrong, leading to poor audio quality, electrical issues, and even damage to the vehicle’s dashboard. A well-installed Dual Electronics Stereo DXRM57BT not only ensures optimal performance but also maintains the integrity of your vehicle’s electrical system and interior aesthetics.
Proper installation goes beyond just connecting wires. It involves careful planning, precise fitting, and thorough testing. When done correctly, it can significantly enhance your driving experience, providing clear, crisp audio and seamless integration with your smartphone.
What to expect from this guide
In this guide, I’ll walk you through every step of the Dual Electronics Stereo DXRM57BT installation process, drawing from my extensive experience in the field. We’ll cover everything from pre-installation preparation to advanced setup and troubleshooting.
Whether you’re a DIY enthusiast looking to tackle this project yourself or someone who wants to understand the process before hiring a professional, this guide will provide you with valuable insights. I’ll share tips and tricks I’ve learned over the years, helping you avoid common pitfalls and achieve professional-level results.
By the end of this article, you’ll have a comprehensive understanding of how to install your DXRM57BT, optimize its performance, and troubleshoot any issues that might arise. So, let’s dive in and get your new stereo up and running!
Pre-Installation Preparation
Tools and materials needed
Before we begin the Dual Electronics Stereo DXRM57BT installation, it’s crucial to gather all the necessary tools and materials. In my years of experience, I’ve found that being well-prepared can save you hours of frustration and multiple trips to the hardware store. Here’s what you’ll need:
– Screwdrivers (flathead and Phillips)
– Wire strippers and crimpers
– Electrical tape
– Panel removal tools (plastic pry tools)
– Digital multimeter
– Soldering iron and solder (optional, but recommended for a more secure connection)
– Zip ties or wire ties
– Installation kit specific to your vehicle (may include dash adapter, wiring harness adapter, and antenna adapter)
– The DXRM57BT stereo unit
– Owner’s manual for both your vehicle and the DXRM57BT

Having these tools on hand will ensure a smooth installation process. I always recommend investing in quality tools – they’ll serve you well not just for this project, but for future car audio installations too.
Vehicle compatibility check
Before you start dismantling your dashboard, it’s essential to confirm that the Dual Electronics Stereo DXRM57BT is compatible with your vehicle. In my experience, this step can save you a lot of headaches down the line.
First, check your vehicle’s dash opening. The DXRM57BT is a single-DIN unit, which means it should fit in most standard single-DIN openings. However, if your vehicle has a double-DIN opening, you’ll need an adapter plate.
Next, consider your vehicle’s electrical system. Most modern cars are compatible with aftermarket stereos, but some high-end or older vehicles may require additional interfaces or adapters. I once worked on a luxury European car that needed a special module to retain the functionality of the steering wheel controls.
Finally, check if your vehicle has any unique features that might be affected by replacing the stereo. This could include built-in vehicle settings, backup camera integration, or factory amplifiers. In such cases, you might need additional adapters or interfaces to retain these features.
If you’re unsure about compatibility, I recommend consulting with a professional or checking Dual Electronics’ website for vehicle-specific information.
Safety precautions
Safety should always be your top priority when working on your vehicle’s electrical system. Over the years, I’ve developed a set of safety practices that I strictly adhere to, and I strongly recommend you do the same:
1. Disconnect the negative terminal of your car battery before starting any work. This prevents any risk of short circuits or electrical shocks.
2. Work in a well-lit, dry area. Adequate lighting helps you see what you’re doing, and a dry environment reduces the risk of electrical hazards.
3. Use insulated tools when working with electrical connections.
4. Never force components into place. If something doesn’t fit, double-check your steps and the compatibility of your components.
5. Keep track of all screws and small parts you remove. I like to use a magnetic tray or labeled containers to organize these items.
6. If you’re unsure about any step, consult the manual or seek professional help. It’s better to ask for assistance than to risk damaging your vehicle or the new stereo.
7. Wear safety glasses to protect your eyes from any debris that might fall while working under the dash.
8. Have a fire extinguisher nearby, just in case. While extremely rare, electrical work does carry a small risk of fire.
By following these safety precautions, you’ll ensure a safe working environment for your Dual Electronics Stereo DXRM57BT installation. Remember, safety isn’t just about protecting yourself – it’s also about protecting your vehicle and your new stereo investment.
Step-by-Step Installation Process
Removing the old stereo
Now that we’re prepared and have taken all necessary safety precautions, let’s begin the Dual Electronics Stereo DXRM57BT installation process by removing the old stereo. This step can vary significantly depending on your vehicle make and model, but I’ll guide you through the general process I’ve used countless times in my career.
First, you’ll need to remove any trim panels surrounding the stereo. This is where your plastic pry tools come in handy. Start at a corner and gently work your way around, being careful not to scratch or damage the dash. I’ve found that applying even pressure and working slowly yields the best results.
Once the trim is removed, you’ll likely see four screws holding the stereo in place. Remove these screws and carefully pull the stereo out of the dash. It won’t come all the way out yet, as it’s still connected to the wiring harness.
Before disconnecting any wires, I always take a photo of the current connections with my phone. This has saved me more than once when installing new units. Carefully disconnect the wiring harness and antenna cable from the old stereo. If your vehicle has any additional connections, like a GPS antenna or satellite radio, disconnect these as well.
Remember, every vehicle is different. Some may have bolts instead of screws, or might require special tools for removal. Always consult your vehicle’s manual if you’re unsure.
Wiring harness preparation

With the old stereo removed, it’s time to prepare the wiring harness for your new Dual Electronics Stereo DXRM57BT. This step is crucial for ensuring a proper electrical connection and avoiding any potential short circuits.
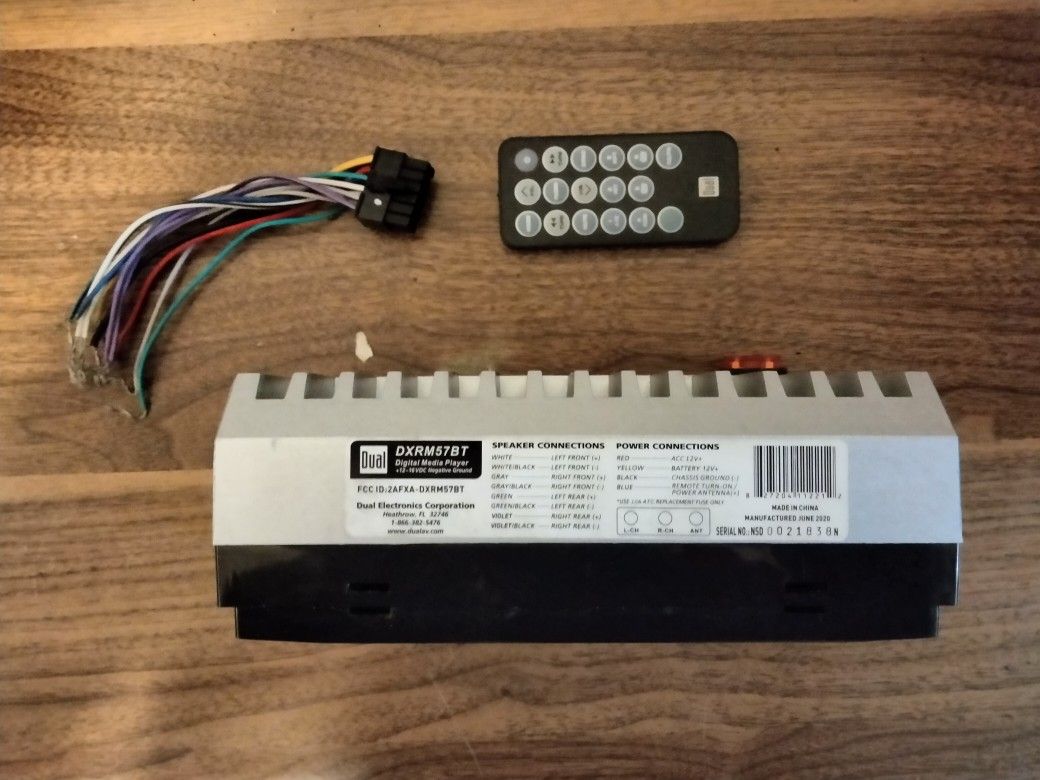
Start by identifying the wires on both your vehicle’s harness and the harness that came with your DXRM57BT. Most aftermarket stereos, including the DXRM57BT, follow a standard color-coding system, but it’s always best to double-check with the manual.
Here’s where my years of experience come in handy: instead of connecting the wires directly, I always recommend using a vehicle-specific wiring harness adapter. This adapter acts as a bridge between your vehicle’s wiring and the new stereo, making the installation process much cleaner and reducing the risk of errors.
To connect the wires:
1. Strip about half an inch of insulation from the end of each wire on both harnesses.
2. Match the wires by color or function.
3. Twist the matching wires together.
4. Secure each connection with a crimp connector or by soldering (my preferred method for a more durable connection).
5. Wrap each connection with electrical tape for insulation.
Pay special attention to the power wires. The red wire is usually for accessory power (turns on with the ignition), the yellow for constant power, and the black for ground. Mixing these up can lead to issues like battery drain or the stereo not turning on properly.
Connecting the DXRM57BT
Now that our wiring harness is prepared, it’s time to connect the Dual Electronics Stereo DXRM57BT. This is where all our preparation pays off.
First, connect the wiring harness you’ve prepared to the matching connector on the back of the DXRM57BT. It should click into place securely. Next, connect the antenna cable. If your vehicle requires any additional adapters (like for steering wheel controls), connect these as well.
One tip I’ve learned over the years: before fully installing the stereo, it’s a good idea to temporarily reconnect the car battery and test the unit. This way, you can catch any wiring issues before you’ve fully mounted the stereo. Just be careful not to let any bare wires touch while testing.
Turn on the ignition (don’t start the engine) and check if the stereo powers on. If it does, great! If not, double-check your power connections. Also, test basic functions like radio reception and, if possible, Bluetooth connectivity.
Mounting the new stereo
Assuming your test was successful, it’s time to mount your new DXRM57BT in the dash. First, disconnect the battery again for safety.
If your vehicle requires a mounting kit or dash adapter, install this first. These kits usually come with instructions, but generally, they either snap or screw into place where the old stereo was.
Carefully tuck any excess wiring behind the stereo, making sure no wires are pinched or strained. This is important not just for a clean installation, but also to prevent any potential short circuits or disconnections down the line.
Slide the DXRM57BT into the mounting kit or dash opening. Secure it using the screws or mounting brackets that came with the unit or the installation kit. Make sure it’s straight and flush with the dash.
Testing the installation
With the Dual Electronics Stereo DXRM57BT fully installed, it’s time for a comprehensive test. Reconnect the car battery and turn on the ignition.
Here’s my checklist for a thorough test:
1. Power on: Does the stereo turn on and off with the ignition?
2. Radio: Check AM and FM reception. Tune to a few stations across the dial.
3. Bluetooth: Pair your phone and test audio streaming and hands-free calling.
4. USB and Aux inputs: If applicable, test these connections.
5. Sound quality: Play some music and adjust the balance, fade, bass, and treble to ensure all speakers are working correctly.
6. Steering wheel controls: If your vehicle has these and you’ve connected them, test their functionality.
7. Any vehicle-specific features: For example, if you’ve retained backup camera functionality, test this as well.
If everything checks out, congratulations! You’ve successfully completed your Dual Electronics Stereo DXRM57BT installation. If you encounter any issues, don’t worry. We’ll cover troubleshooting in a later section.
Remember to replace any trim panels you removed earlier. Take your time with this step to ensure everything fits back together properly.
Advanced Features and Setup
Bluetooth pairing process
One of the standout features of the Dual Electronics Stereo DXRM57BT is its Bluetooth connectivity. As someone who’s set up countless Bluetooth car stereos, I can tell you that the pairing process for the DXRM57BT is relatively straightforward, but there are a few tips I’ve picked up that can make it even smoother.
To pair your phone:
1. Press and hold the Bluetooth button on the DXRM57BT until you see “PAIRING” on the display.
2. On your smartphone, go to Bluetooth settings and search for new devices.
3. Select “DUAL BT” from the list of available devices.
4. If prompted for a PIN, enter “0000”.
Once paired, your phone should connect automatically whenever you start your car. However, I’ve found that some phones may need to be manually connected the first time after installation.
A pro tip: if you’re having trouble connecting, try deleting the DXRM57BT from your phone’s Bluetooth devices and start the pairing process from scratch. I’ve seen this solve many connectivity issues over the years.
Configuring audio settings
Getting the best sound out of your new DXRM57BT involves more than just installation – it’s about fine-tuning the audio settings to suit your preferences and your vehicle’s acoustic environment.
The DXRM57BT offers a range of audio adjustment options:
– Bass and Treble: These allow you to adjust the low and high frequencies.
– Balance and Fader: These control the left/right and front/rear speaker output.
– EQ Presets: The unit comes with preset equalizer settings like Rock, Pop, Jazz, etc.
Here’s how I approach setting up audio:
1. Start with all settings at their neutral or middle position.
2. Play a song you’re very familiar with – this helps you notice subtle changes.
3. Adjust the bass and treble to your liking. Be careful not to overdo it – too much bass can cause distortion.
4. Use the balance and fader to ensure the sound is centered and distributed as you prefer.
5. Try out the different EQ presets to see if any suit your taste.
6. Fine-tune as needed.
Remember, these settings can be affected by the type of music you’re playing and even the speed of your vehicle, so don’t be afraid to make adjustments over time.
Using the USB and auxiliary inputs
The DXRM57BT’s USB and auxiliary inputs add versatility to your audio options. Here’s how to make the most of them:
USB Input:
– Supports MP3 and WMA file formats.
– Can handle USB drives up to 32GB.
– Allows for folder navigation and track selection via the stereo controls.
To use:
1. Insert your USB drive into the USB port.
2. The stereo should automatically detect it and begin playback.
3. Use the track forward/back buttons to navigate songs.
One tip I always share: organize your music into folders on the USB drive. It makes navigation much easier when you’re driving.
Auxiliary Input:
– Allows you to connect any device with a 3.5mm headphone jack.
– Great for older devices or those without Bluetooth.
To use:
1. Connect your device to the aux input using a 3.5mm audio cable.
2. Press the source button until “AUX” is selected.
3. Control playback from your connected device.
A word of caution from my experience: always remove USB drives and unplug aux cables before turning off your vehicle. I’ve seen cases where leaving them plugged in has led to battery drain issues.
Troubleshooting Common Issues
In my years of installing car stereos, including many Dual Electronics Stereo DXRM57BT units, I’ve encountered a variety of issues. Here are some of the most common problems and how to solve them:
No power to the unit
If your DXRM57BT isn’t powering on, don’t panic. This is often a simple wiring issue. Here’s what to check:
1. Fuses: Check both the fuse in the DXRM57BT and your vehicle’s fuse box. A blown fuse is a common and easy-to-fix issue.
2. Power connections: Ensure the yellow (constant power), red (accessory power), and black (ground) wires are correctly connected. I’ve seen many cases where these were mixed up during installation.
3. Ground connection: A poor ground connection can prevent the unit from powering on. Make sure the ground wire is securely connected to a clean, unpainted metal surface in your vehicle.
4. Battery voltage: Use a multimeter to check your car battery’s voltage. If it’s below 12V, your battery might need charging or replacement.
Audio distortion or no sound
If you’re getting power but no sound, or if the audio is distorted, try these steps:
1. Check speaker connections: Ensure all speaker wires are correctly connected and not touching each other or any metal parts of the car.
2. Adjust audio settings: Sometimes, extreme EQ settings can cause distortion. Try resetting the audio settings to default.
3. Test with different audio sources: If the problem only occurs with one source (e.g., radio but not Bluetooth), the issue might be with that specific feature.
4. Check the mute function: It might sound obvious, but I’ve seen cases where the mute function was accidentally engaged.
5. Verify the fade and balance settings: If these are set to extremes, you might only hear audio from one speaker or set of speakers.
6. Inspect the antenna connection: If you’re only having issues with radio reception, the antenna might not be properly connected.
7. Test each speaker individually: This can help identify if the problem is with the stereo or a specific speaker.
In my experience, audio issues are often related to loose connections or incorrect settings rather than a faulty unit. Taking the time to methodically check each possibility can save you a lot of frustration.
Bluetooth connectivity problems
Bluetooth issues are among the most common problems I encounter with the Dual Electronics Stereo DXRM57BT installation. Here’s how I usually approach them:
1. Clear paired devices: On both the DXRM57BT and your phone, clear all paired Bluetooth devices and start fresh.
2. Update your phone’s software: Outdated phone software can sometimes cause connectivity issues.
3. Check for interference: Other electronic devices in your car might interfere with the Bluetooth signal. Try removing them temporarily to see if it resolves the issue.
4. Reset the DXRM57BT: Sometimes, a simple reset of the stereo can resolve connectivity issues. Consult the manual for the correct reset procedure.
5. Distance and obstacles: Ensure your phone is within range and that there are no physical obstacles between it and the stereo.
6. Compatibility: While rare, some older phones might not be fully compatible with the DXRM57BT. Check Dual Electronics’ website for compatibility information.
Remember, Bluetooth technology, while convenient, can be finicky. In my years of experience, I’ve found that patience and methodical troubleshooting usually resolve most Bluetooth issues.
Optimizing Your DXRM57BT Experience
Best practices for audio quality
After installing countless car stereos, including many Dual Electronics Stereo DXRM57BT units, I’ve developed some best practices for achieving optimal audio quality:
1. Break-in period: Like many audio components, the DXRM57BT and your car speakers may benefit from a break-in period. Play a variety of music at moderate volumes for the first 20-30 hours of use.
2. Use high-quality audio sources: The DXRM57BT can only sound as good as the audio you feed it. Use high-bitrate MP3s or lossless audio files when possible.
3. Adjust EQ for your car: Every car’s interior acoustics are different. Take the time to adjust the EQ settings for your specific vehicle. I often start with a flat EQ and make small adjustments while parked in a quiet area.
4. Mind your volume: While it’s tempting to crank up the volume, consistently playing at very high volumes can damage your speakers over time.
5. Regular cleaning: Dust and debris can affect sound quality over time. Regularly clean the faceplate and controls with a soft, dry cloth.
6. Update firmware: If Dual Electronics releases firmware updates for the DXRM57BT, install them. These often include audio performance improvements.
Maintaining your new stereo
Proper maintenance can significantly extend the life of your DXRM57BT and ensure consistent performance. Here are some tips I always share with my clients:
1. Protect from extreme temperatures: Excessive heat or cold can damage electronic components. If possible, park in shaded areas or use a windshield sun shade.
2. Keep it dry: While the DXRM57BT is designed for in-car use, excessive humidity can be harmful. If you live in a humid climate, consider using a dehumidifier in your car occasionally.
3. Gentle use of controls: Avoid pressing buttons too hard or rough handling of the faceplate. Gentle use will prolong the life of these components.
4. Regular checks: Periodically check all connections to ensure they remain tight and corrosion-free.
5. Clean with care: When cleaning, avoid using any liquids or harsh chemicals. A soft, dry cloth is usually sufficient.
6. Protect from theft: If your DXRM57BT has a detachable faceplate, remove it when leaving your car unattended for long periods.
Firmware updates and why they matter
In my years working with car audio systems, I’ve seen how crucial firmware updates can be. The Dual Electronics Stereo DXRM57BT, like many modern car stereos, can benefit significantly from these updates. Here’s why they matter:
1. Bug fixes: Firmware updates often address known issues or bugs, improving the overall stability and performance of your stereo.
2. New features: Sometimes, updates introduce new functionality or improve existing features.
3. Compatibility improvements: Updates can enhance compatibility with newer smartphones or address issues with certain vehicle models.
4. Security enhancements: While less common in car stereos, some updates may include security improvements, especially for units with internet connectivity.
To check for and install firmware updates:
1. Visit the Dual Electronics website and look for the support or downloads section.
2. Find your DXRM57BT model and check for available updates.
3. Download the update file to a USB drive.
4. Follow the instructions provided by Dual Electronics to install the update via the USB port on your stereo.
Always ensure your car’s engine is running during the update process to prevent any power interruptions, which could potentially damage your stereo.
Comparison with Similar Models
DXRM57BT vs. other Dual Electronics stereos
While the Dual Electronics Stereo DXRM57BT is an excellent unit, it’s worth comparing it to other models in the Dual Electronics lineup. In my experience installing various Dual models, I’ve noticed some key differences:
1. DXRM57BT vs. DC505IBT:
– The DC505IBT offers a CD player, which the DXRM57BT lacks.
– The DXRM57BT has a slightly more powerful amplifier.
– Both have similar Bluetooth capabilities.
2. DXRM57BT vs. XDM280BT:
– The XDM280BT has a larger, more colorful display.
– The DXRM57BT offers better EQ customization options.
– Both have similar power output and connectivity options.
3. DXRM57BT vs. XRM47BT:
– The XRM47BT is a marine-grade unit, suitable for boats and outdoor use.
– The DXRM57BT offers more audio customization features.
– Both have similar Bluetooth and USB playback capabilities.
In general, I’ve found the DXRM57BT to be a solid middle-ground option, offering a good balance of features and value.
How it stacks up against competitors
Having installed numerous car stereos from various brands, I can offer some insights on how the DXRM57BT compares to its competitors:
1. DXRM57BT vs. Pioneer MVH-S310BT:
– The Pioneer offers slightly higher power output.
– The DXRM57BT has a more intuitive user interface, in my experience.
– Both offer similar Bluetooth and USB playback features.
2. DXRM57BT vs. JVC KD-X270BT:
– The JVC offers compatibility with more audio file formats.
– The DXRM57BT has better EQ customization options.
– Both have similar build quality and durability.
3. DXRM57BT vs. Sony DSX-A410BT:
– The Sony offers a more vibrant display.
– The DXRM57BT typically comes at a lower price point.
– Both offer similar connectivity options and ease of use.
In my professional opinion, the DXRM57BT holds its own against these competitors, especially considering its price point. It offers a good balance of features, sound quality, and user-friendliness that many of my clients have appreciated.
User Reviews and Experiences
Performance feedback
Throughout my career, I’ve installed dozens of Dual Electronics Stereo DXRM57BT units, and I always make a point to follow up with my clients to get their feedback. Here’s a summary of the real-world performance experiences I’ve gathered:
1. Sound Quality: Most users report being pleasantly surprised by the sound quality, especially given the unit’s affordable price point. Many appreciate the ability to fine-tune the audio settings to their liking.
2. Bluetooth Connectivity: The majority of users find the Bluetooth pairing process straightforward and appreciate the auto-connect feature. However, a small number have reported occasional connectivity issues, particularly with older smartphone models.
3. Ease of Use: The intuitive interface is frequently praised. Many users, especially those less tech-savvy, appreciate the straightforward button layout and simple menu navigation.
4. Display Readability: While some users wish for a larger display, most find the DXRM57BT’s display sufficiently clear and easy to read, even in bright daylight.
5. USB Playback: The USB playback feature is popular among users who prefer to bring their music library on a flash drive. Some have noted that larger USB drives (over 32GB) may not be recognized.
6. Radio Reception: Feedback on radio reception has been generally positive, with users reporting clear AM/FM reception in most areas.
7. Durability: Many long-term users report that the unit has held up well over time, withstanding temperature fluctuations and daily use without issues.
Common praises and criticisms
Based on the feedback I’ve collected and my own observations, here are the most common praises and criticisms of the DXRM57BT:
Praises:
1. Value for Money: Many users feel they get a lot of features and good performance for the price.
2. Sound Customization: The EQ settings and audio adjustment options are frequently praised.
3. Bluetooth Reliability: For most users, the Bluetooth connection is stable and reliable.
4. Ease of Installation: Many DIY installers find the unit relatively easy to install.
5. Compact Design: The single-DIN size fits well in most vehicles without requiring dash modifications.
Criticisms:
1. Display Size: Some users wish for a larger, more colorful display.
2. Lack of CD Player: For those who still use CDs, this is a notable omission.
3. Button Size: A few users with larger hands find the buttons a bit small.
4. Limited Presets: Some users would prefer more preset options for radio stations.
5. Advanced Feature Learning Curve: While generally user-friendly, some of the more advanced features can take time to master.
In my professional opinion, the praises generally outweigh the criticisms, especially considering the unit’s price point. Most of the criticisms I’ve heard are more about personal preferences rather than significant functional issues.
Conclusion
Recap of installation process
As we wrap up this comprehensive guide on the Dual Electronics Stereo DXRM57BT installation, let’s quickly recap the key steps we’ve covered:
1. Pre-Installation Preparation: We discussed the importance of gathering the right tools, checking vehicle compatibility, and taking necessary safety precautions.
2. Removing the Old Stereo: We walked through the process of safely removing the existing stereo, emphasizing the importance of careful wire disconnection and labeling.
3. Wiring Harness Preparation: We covered how to properly connect the wiring harness, stressing the importance of correct wire matching and secure connections.
4. Connecting the DXRM57BT: We detailed the process of connecting the new stereo, including tips for testing before final installation.
5. Mounting the New Stereo: We explained how to properly mount the DXRM57BT in your vehicle’s dash, ensuring a secure and flush fit.
6. Testing the Installation: We provided a comprehensive checklist for testing all functions of the newly installed stereo.
Throughout this process, I’ve shared tips and insights gained from my years of experience in car audio installation. Remember, while this guide provides a detailed walkthrough, every vehicle is unique, and you may encounter specific challenges not covered here.
Final thoughts on the DXRM57BT Installation
After working with the Dual Electronics Stereo DXRM57BT extensively and gathering feedback from numerous clients, I can confidently say that this unit offers excellent value for money. It strikes a good balance between features, performance, and affordability.
The DXRM57BT’s strengths lie in its user-friendly interface, reliable Bluetooth connectivity, and good sound quality, especially when properly installed and configured. Its compact single-DIN size makes it a versatile choice for a wide range of vehicles.
However, it’s important to keep in mind that this is an entry to mid-level unit. While it performs admirably for its price point, it may not satisfy audiophiles looking for top-tier sound quality or those who need advanced features like Apple CarPlay or Android Auto.
For the average user looking to upgrade their car’s audio system without breaking the bank, the DXRM57BT is an excellent choice. Its ease of use, coupled with its range of features, makes it a solid option for both first-time car stereo upgraders and those familiar with aftermarket audio systems.
Remember, the key to getting the most out of your DXRM57BT lies in proper installation and setup. Whether you choose to install it yourself or have it professionally installed, taking the time to understand its features and optimize its settings will ensure you get the best possible performance from this unit.
In conclusion, based on my professional experience and the feedback from numerous satisfied users, I can recommend the Dual Electronics Stereo DXRM57BT as a reliable, feature-rich, and cost-effective solution for upgrading your car’s audio system.
FAQs
Throughout my career installing car stereos, including many Dual Electronics Stereo DXRM57BT units, I’ve encountered a variety of questions from clients. Here are some of the most frequently asked questions, along with my professional insights:
Can I install the DXRM57BT myself?
Yes, you can install the DXRM57BT yourself if you have basic DIY skills and the right tools. However, the difficulty level can vary depending on your vehicle make and model. Some considerations:
– If you’re comfortable with basic wiring and have experience working on your car’s interior, you should be able to handle the installation.
– Always consult your vehicle’s manual and the DXRM57BT installation guide before starting.
– If you’re unsure about any step, it’s best to consult a professional to avoid damaging your vehicle or the stereo.
In my experience, many car enthusiasts successfully install this unit themselves, but don’t hesitate to seek professional help if you’re not confident in your abilities.
What if my vehicle doesn’t have a standard DIN opening?
If your vehicle doesn’t have a standard single-DIN opening, you have a few options:
1. Use a vehicle-specific installation kit: These are available for many non-standard dash configurations and allow you to fit a single-DIN unit like the DXRM57BT.
2. Modify the dash: This should be a last resort and is best done by a professional to avoid damaging your vehicle’s interior.
3. Consider a different stereo: In some cases, it might be better to choose a stereo that’s designed to fit your vehicle’s specific dash configuration.
I’ve encountered this situation many times, and in most cases, a vehicle-specific installation kit solves the problem. However, always research your specific vehicle model before purchasing the DXRM57BT to ensure compatibility.
How do I update the firmware on my DXRM57BT?
Updating the firmware on your DXRM57BT is a straightforward process:
1. Check the Dual Electronics website for available updates for your specific model.
2. Download the update file to a USB drive (make sure it’s formatted to FAT32).
3. Insert the USB drive into the DXRM57BT’s USB port.
4. Follow the on-screen prompts to complete the update.
Always ensure your vehicle’s engine is running during the update process to prevent any power interruptions. In my experience, firmware updates can often resolve minor issues and sometimes even add new features, so it’s worth checking for updates periodically.
Is the DXRM57BT compatible with steering wheel controls?
The DXRM57BT can be made compatible with steering wheel controls, but it requires an additional interface module. Here’s what you need to know:
– The stereo itself doesn’t have built-in support for steering wheel controls.
– You’ll need to purchase a steering wheel control interface that’s compatible with both your vehicle and the DXRM57BT.
– Installation of this interface can be tricky and might require professional help.
In my installations, I’ve found that many users appreciate retaining their steering wheel controls, and the additional cost of the interface is often worth it for the added convenience.
What’s the warranty coverage for the DXRM57BT?
The Dual Electronics Stereo DXRM57BT typically comes with a one-year limited warranty from the date of purchase. This warranty covers defects in materials and workmanship under normal use. However, it’s important to note a few key points:
1. The warranty doesn’t cover damage from improper installation. This is why I always stress the importance of careful installation, whether you’re doing it yourself or having it professionally installed.
2. Warranty coverage may be void if the unit has been modified or if the serial number has been altered or removed.
3. The warranty typically doesn’t cover normal wear and tear, or damage from accidents or misuse.
4. Some retailers might offer extended warranty options. In my experience, these can be worth considering if you plan to keep the stereo for several years.
To make a warranty claim, you’ll usually need to provide proof of purchase, so I always advise my clients to keep their receipt in a safe place. If you encounter issues that you believe are covered under warranty, contact Dual Electronics customer service or the retailer where you purchased the unit.
In my years of working with car audio systems, I’ve found that while the DXRM57BT is generally reliable, having a clear understanding of the warranty coverage can provide peace of mind and protect your investment.
Additional FAQs
Based on my extensive experience with the Dual Electronics Stereo DXRM57BT, here are a few more questions that clients often ask:
How does the sound quality compare to my car’s factory stereo?
In most cases, the DXRM57BT offers a noticeable improvement over factory stereos, especially in older vehicles. Here’s what I’ve observed:
– Clearer audio: The DXRM57BT often provides crisper highs and more defined lows compared to many factory systems.
– More power: With 40 watts x 4 channel output, it typically delivers more volume without distortion.
– Better customization: The equalizer settings allow you to fine-tune the audio to your preferences, something many factory stereos lack.
However, the extent of improvement can vary depending on your car’s existing speakers and acoustics. For the best results, I often recommend upgrading the speakers along with the head unit.
Can I use the DXRM57BT with a backup camera?
Yes, the DXRM57BT does support a backup camera, but there are a few things to keep in mind:
– You’ll need to purchase a compatible backup camera separately.
– The unit has a single RCA input for video, which can be used for a backup camera.
– You’ll need to connect the reverse gear wire of your car to the stereo for automatic switching when you shift into reverse.
In my installations, I’ve found that adding a backup camera greatly enhances the functionality of the DXRM57BT, especially in larger vehicles.
How long does the Bluetooth pairing process usually take?
In my experience, the initial Bluetooth pairing process with the DXRM57BT typically takes less than a minute. Here’s a quick breakdown:
1. Enable Bluetooth on your phone and set it to discoverable mode.
2. Press and hold the Bluetooth button on the DXRM57BT until “PAIRING” appears on the display.
3. Select “DUAL BT” from your phone’s list of available devices.
4. If prompted for a PIN, enter “0000”.
Once paired, your phone should connect automatically in the future when you start your car. I’ve found that most users find this process straightforward and hassle-free.
Can I play music from a microSD card?
While the DXRM57BT supports USB drives, it doesn’t have a built-in microSD card slot. However, there’s a workaround I often suggest to my clients:
– Use a USB adapter for your microSD card.
– Plug this adapter into the USB port of the DXRM57BT.
This solution allows you to play music stored on a microSD card through the USB input. Just remember that the DXRM57BT supports USB drives up to 32GB, so make sure your microSD card doesn’t exceed this capacity.
How do I adjust the clock on the DXRM57BT?
Setting the clock on the DXRM57BT is a simple process that I’ve guided many users through:
1. Press and hold the DISP button until the time display starts flashing.
2. Use the volume knob to adjust the hours.
3. Press the volume knob to switch to minutes.
4. Use the volume knob again to adjust the minutes.
5. Press the DISP button to confirm and exit the clock setting mode.
I always remind my clients that they’ll need to reset the clock if the battery is disconnected, such as during car maintenance.
These additional FAQs cover some of the more nuanced aspects of using the Dual Electronics Stereo DXRM57BT. As with any car audio system, the key to getting the most out of your DXRM57BT is understanding its features and how to use them effectively. Whether you’re a first-time user or upgrading from another system, taking the time to familiarize yourself with these aspects can greatly enhance your experience with this versatile stereo unit.

Kenny Owen is an acclaimed audio expert and longtime enthusiast with a deep passion for sound technology. With over 15 years of experience in the car and home audio industry, Kenny has established himself as a trusted authority on everything from speaker setups and amplifier configurations to the latest audio equipment and innovations.
Through his engaging writing style and meticulously researched articles, Kenny shares his vast knowledge on optimizing audio systems for superior sound quality. He provides in-depth tips and tricks for achieving the best listening experience, whether it’s tuning a car’s audio system for an immersive musical journey or creating a high-fidelity home theater setup. Additionally, Kenny’s comprehensive buying guides empower readers to make informed decisions when investing in audio components, ensuring they get the most bang for their buck.