You may have installed the best car audio system, only for unwanted noise to interfere with your car music listening experience. Unwanted road noise can force you to turn up the volume of your car stereo to the maximum. However, this will only worsen the situation as it’ll make your car cabin feel extremely noisy. So how does installing car sound deadening material help?
Road noise can make high frequencies sound muddy. Unwanted noise and vibrations in the car cabin can also reduce bass and volume. Fortunately, you can deal with this problem by installing car sound deadening mat. Sound deadeners work by reducing the amount of external noise that enters the car cabin. In this article, we’ll show you how to install automotive sound deadening material in your car.
Popular car Sound Deadening Materials
Before you learn how to install sound dampening material for cars, it’s important to know the available types of sound deadeners for cars. Each type of sound deadening insulation has its purpose and ideal location for installation. Here’re the main options to choose from:
1. Sound deadening Mats
Sound damping mats are specially designed to soundproof the car panels. Their main benefit is the ease of installation. They come with an adhesive backing for easy installation. You can install them on the floor and door panels. They’re bulky enough to reduce resonance and vibrations on the car panels. Most sound deadening mats are made of asphaltic panes or styrene-butadiene rubber. Some of the best sound damping mats are Kilmat Sound Deadener and Dynamat Sound Deadener.
2. Sound deadening Insulation
Insulation is a sound damping material made of thick fibers. It’s designed to absorb noise and is mainly installed under the car carpet. Also, you can install it on the roof and doors. Sound deadening insulation also offers thermal insulation in the cabin due to its reflective properties.
3. Sound deadening Foam
Sound dampening foam is available in the form of foam spray or sheets. Soundproof foam sheets are installed like damping mats over the panels. They work by absorbing vibrations. The vibrations are dispersed throughout the foam material. Their lightweight nature makes them ideal for installation on the door panels. Acoustic foam sprays, on the other hand, come in compressor cans for easier application. They’re great for installation in tight spaces.
4. Soundproofing spray foam
Spray sound deadening comes in compressor cans or aerosol cans for easier application. They’re ideal for installation where other forms of sound dampeners aren’t feasible, especially in tight and compact locations. Also, soundproofing spray foam are great for installation where sound deadening mats would be too thick or too heavy to fit in.
DIY Automotive car Sound Deadening Material
Before insulating your car against noise and vibrations, you need to gather certain supplies and tools including:
- Sound deadener material
- Hand roller
- Automotive tape
- Weatherstrip adhesive
- Trim removal tool kit
- Gloves
- Pruning shears
- Utility knife
- A set of screwdrivers
- Clean rags
- Rubbing alcohol
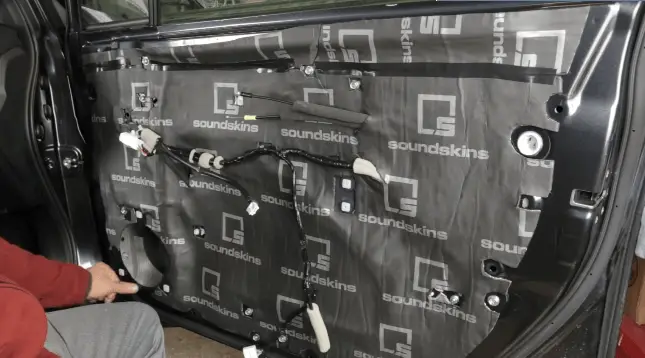
Car door sound deadening
It’s important to soundproof car doors to reduce road noise and vibrations from the door panels. Here is how to install sound damping material on the door panels:
Step 1– Start by removing the door panels. Use a trim removal tool to pry out each door panel. Check for any screws that may be holding the door panel in place and remove them with the right type of screwdriver. Avoid using force when prying out the door panels.
Step 2– Dampen a clean rag with rubbing alcohol. Use the dampened rag to clean the door.
Step 3– Take measurements of the door, specifically the entire area you want to soundproof.
Step 4– Use the measurements to cut the sound deadener to size.
Step 5– Apply the soundproofing material over the door panel. Start with inner sections. If the sound deadening insulation material doesn’t have a self-adhesive backing, apply weatherstrip adhesive to stick it in place.
If the insulation has a self-adhesive backing, just peel off the backing sheet to expose the adhesive. Next, stick the insulation in place. Use spray foam or spray insulation to insulate tight sections of the door.
Step 6– Press the insulation over the door with a hand roller for a tight installation.
Step 7– Mount the door panel in place. Return any screws you removed.
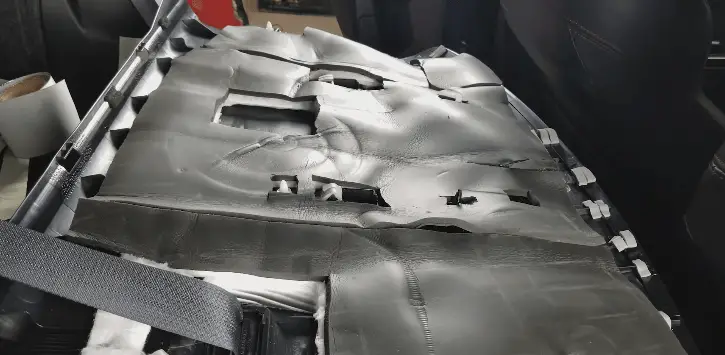
Car Floor sound deadening
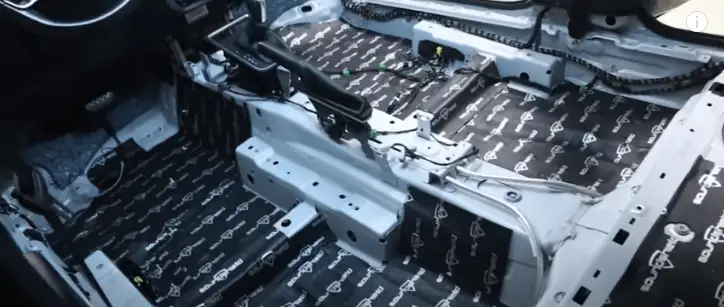
Insulating the car floor reduces both heat and noise. Here’s how to install car sound deadening material on the floor:
Step 1– First, remove the carpet and set it aside. It might take more effort and time to remove a carpet that’s held in place with glue. You’ll find it easier to remove a carpet that’s held in place with clips.
Step 2– Clean the exposed floor thoroughly. Use a vacuum cleaner to get rid of tiny dirt particles and crumbs.
Step 3– Apply the preferred sound deadener over the floor. Ensure you cut the insulation to size. Press the insulation material against the floor with a hand roller. Use spray foam or spray insulation for tight spots.
Step 4– Reinstall the carpet in place.
Car Roof sound deadening
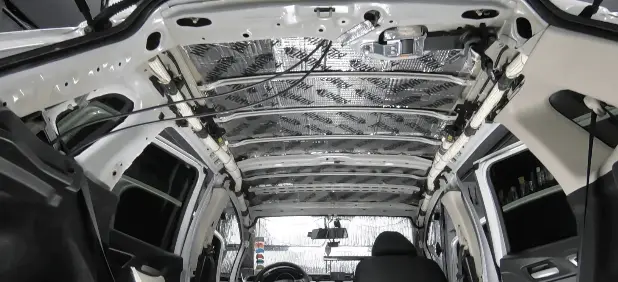
The car roof tends to allow wind noise into the cabin. Also, a lot of heat enters the cabin through the roof, especially on a sunny day. Here’s how to insulate and sound deaden the car roof:
Step 1– Remove the headliner gently to avoid tearing it apart as you’ll need to reinstall it.
Step 2– Dampen a clean rag with rubbing alcohol. Next, clean the exposed roof panel with the rag.
Step 3– Apply the preferred insulation material. Preferably, apply fiberglass mats as they insulate the roof against both heat and noise. Ensure the mat is thick enough for the best results.
Step 4– Reinstall the headliner.
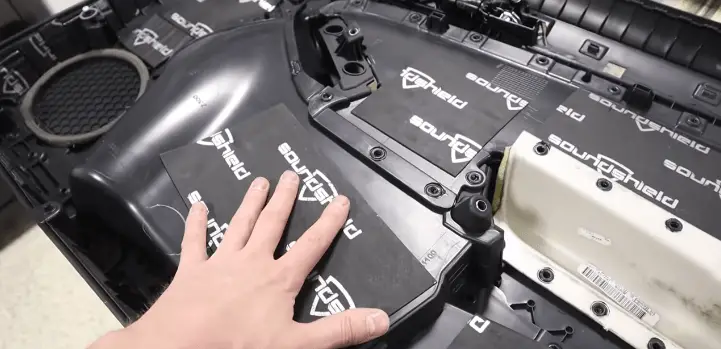
Rear Dash sound deadening
If you have installed car speakers dash, it’ll become more susceptible to vibrations and rattling. In that case, you should sound deaden the rear dash for improved sound quality. Here’s how to do it:
Step 1– Remove any fabric covering the rear dash. Be gentle when removing the fabric.
Step 2– Clean the deck surface with a clean rag dampened with rubbing alcohol.
Step 3– Cut the sound dampening insulation to size.
Step 4– Install the insulation.
Step 5– Reinstall the fabric.
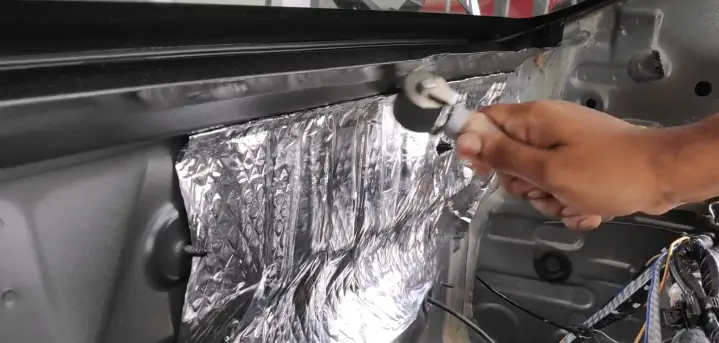
Car Trunk sound deadening

If your trunk is large, it’ll allow more road noise to get into the cabin. Here’s how to sound deaden the trunk:
Step 1– Remove all items you have kept in the trunk.
Step 2– Remove any fabric or carpet covering the trunk.
Step 3– Clean the trunk thoroughly.
Step 4– Install the preferred car sound deadener.
Step 5– Reinstall the trunk fabric or carpet.
installing sound deadening insulation in the Firewall and Hood
The firewall is the area behind the dashboard. It’s prone to noise and vibrations coming from the hood. Also, it’s exposed to heat from the engine and sunlight. Thus, it’ll help to insulate the firewall and hood.
Here’s how to sound deaden the firewall:
Step 1– Turn off the car engine if running. Next, disconnect the negative power cable from the car battery. Doing so will prevent short-circuit when working around wiring in the dashboard.
Step 2– You’ll need to remove the dashboard to access the firewall. Use a trim removal tool to pry off the dashboard. Do it gently to avoid breaking the dashboard panel.
Step 3– Take pictures along the removal process to remember what goes where when reinstalling everything.
Step 4– Pry out the glove compartment.
Step 5– Unhook the car stereo faceplate.
Step 6– Pull out the car stereo gently to avoid ripping out the wiring harness. Once pulled out a few inches, unhook the wiring harness from the car stereo.
Step 7– Dampen a clean cloth with rubbing alcohol. Clean the firewall thoroughly.
Step 8– Install the deadening material after cutting it to size. Cut holes through the sound deadener for wiring.
Step 9– Reinstall everything back in place.
Here is how to sound deaden the hood:
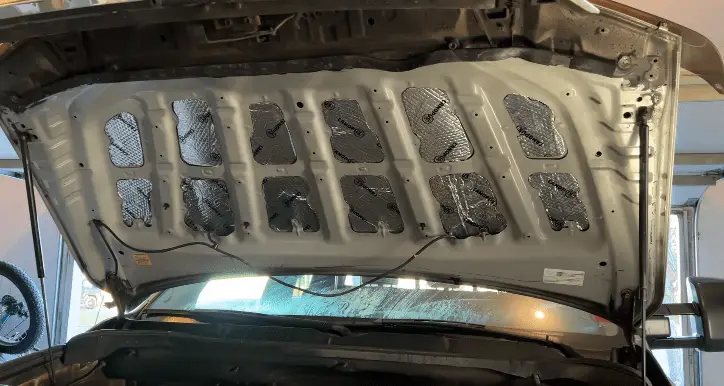
Step 1– Open the hood.
Step 2– Clean the interior surface of the hood with rubbing alcohol to remove grease and oils. If you fail to clean the hood panel, the adhesive on the sound deadener won’t stick in place.
Step 3– Cut the sound deadener to size.
Step 4– Install the sound deadener on the interior surface of the hood.
Step 5– Trim any protruding sections of the sound deadener.
Step 6– Close the hood.
Final Thoughts
Although it may take some time to install car sound proofing material, it’s worth the effort. You’ll enjoy listening to your favorite soundtracks in a quiet environment. Also, installing sound deadening insulation in your car will reduce the amount of heat that gets into your car for a more comfortable cabin. Just ensure you choose the most appropriate car sound deadening material. If you’re unable to do it yourself, hire a professional automotive sound deadening material installer in your area for the best results.
FAQ
Is car sound deadening insulation worth it?
Yes. It eliminates unwanted road noise, engine noise, and vibrations. That way, you’ll have a quieter cabin for the best listening experience.
Where should I put sound deadening material for car cars?
You can install sound deadening in locations such as the door panels, roof, underneath the carpet, inside the hood, in the trunk, firewall, and rear deck.
Do you need a roller to install sound deadening mat?
Yes. A roller is necessary when installing sound deadening material. It helps to stick the material tighter onto the car panel for better insulation. By pressing the material with a hand roller, you’ll eliminate any air bubbles between the car surface and the material for maximum insulation.
How thick of sound deadening mat do I need?
A thicker sound deadener allows for more insulation against noise. The minimum thickness for a sound deadening material should be 50 mil. You can also choose 80 mil thickness for more insulation and 100 mil thickness for the best insulation.
How do you prepare for car sound proofing?
Just ensure the surface you want to install sound deadening is clean. You should remove any dust, dirt, tiny particles, and grease. Vacuuming can help to remove dust and tiny particles. Cleaning the surface with rubbing alcohol can help to remove grease. Stubborn dirt can be removed by cleaning the surface with a water-based cleaner.
Do sound deadening pads work?
Yes. They work by reducing vibrations on car panels. Also, they reduce the amount of road noise that gets into the cabin by absorbing the noise.
What is a good car sound deadening material?
A good sound deadening material is one that can deflect, absorb, or dampen noise. Also, a material that can convert sound energy into minimal heat energy is a good sound damping material.
Where should I put Dynamat in my car?
Dynamat is one of the most popular and among the best automotive sound deadening material for cars. It comes in the form of a sheet. It’s ideal for soundproofing the doors, floor, trunk, and roof.
Also read:
How to Install Noise Filter Car Audio in 4 Easy Steps
Best 6×8 Speakers for Bass – Top 10 Reviews and Buying Guide

Kenny Owen is an acclaimed audio expert and longtime enthusiast with a deep passion for sound technology. With over 15 years of experience in the car and home audio industry, Kenny has established himself as a trusted authority on everything from speaker setups and amplifier configurations to the latest audio equipment and innovations.
Through his engaging writing style and meticulously researched articles, Kenny shares his vast knowledge on optimizing audio systems for superior sound quality. He provides in-depth tips and tricks for achieving the best listening experience, whether it’s tuning a car’s audio system for an immersive musical journey or creating a high-fidelity home theater setup. Additionally, Kenny’s comprehensive buying guides empower readers to make informed decisions when investing in audio components, ensuring they get the most bang for their buck.
