As a self-proclaimed car audio enthusiast, I know firsthand the frustration of having a lackluster sound system in your beloved vehicle. The tinny speakers, the lack of bass, the overall underwhelming audio quality – it can make even the most routine commute feel like a chore instead of a pleasure. But fear not, my fellow car owners, for I’m here to guide you through the transformative process of car amplifier installation and unlocking the true potential of your in-car audio experience.
In this comprehensive article, we’ll explore the world of car amplifiers, exploring their inner workings, the different types available, and how to choose the right one for your specific audio setup. We’ll then embark on a step-by-step journey through the installation process, covering all the necessary equipment, tools, and techniques to ensure a clean, professional-looking result. And if any issues should arise along the way, don’t worry – I’ve got your back with a robust troubleshooting section to help you identify and resolve common problems.
Whether you’re a seasoned DIY enthusiast or a complete novice when it comes to car audio, this article is designed to provide you with the knowledge and confidence you need to take your in-car listening experience to new heights. So, buckle up, crank up the volume, and let’s get started on your journey to audio bliss.
Understanding Car Amplifiers
At the heart of any high-quality car audio system is the amplifier – a device that takes the weak signal from your head unit (or car stereo) and boosts it, providing the necessary power to drive your speakers to their full potential. Without an amplifier, your speakers are essentially operating at a fraction of their capability, limiting the overall sound quality and volume of your music.
Check out: Best Car Amplifier for Bass – Top 10 Picks
What is a Car Amplifier?
In its simplest form, a car amplifier is an electronic device that takes the audio signal from your head unit and amplifies it, increasing the voltage and current to the point where it can effectively power your speakers. This amplification process not only enhances the volume, but also improves the clarity, detail, and dynamic range of your audio, resulting in a more immersive and engaging listening experience.
Car amplifiers come in a variety of configurations, from 2-channel models that power a pair of speakers, to 4-channel amps that can handle front and rear speaker setups, to monoblock amps dedicated solely to driving a subwoofer. The specific type of amplifier you choose will depend on the size and configuration of your car audio system, as well as your personal preferences and desired sound quality.
Choosing the Right Amplifier
Selecting the right car amplifier for your audio system is a crucial step in the upgrade process. There are several factors you’ll need to consider, including the size and power requirements of your speakers, the desired level of sound quality, and, of course, your overall budget.
One of the most important specifications to look at when choosing an amplifier is the power rating, which is typically expressed in watts. This refers to the maximum output power the amp can deliver, with a higher wattage generally translating to greater volume and headroom. However, it’s important to match the amplifier’s power output to the capabilities of your speakers to avoid damage or suboptimal performance.
Additionally, you’ll want to consider the number of channels the amplifier has, as this will determine how many individual speakers it can power. A 2-channel amp might be suitable for a simple front speaker upgrade, while a 4-channel model would be better suited for a full front and rear speaker system. And if you have a subwoofer in your setup, a monoblock amplifier dedicated to low-frequency reproduction could be the way to go.
By carefully assessing your current audio system, understanding your desired sound quality goals, and aligning these factors with the appropriate amplifier specifications, you’ll be well on your way to selecting the perfect component to elevate your in-car audio experience.
Necessary Equipment and Tools
Before we dive into the step-by-step installation process, let’s make sure you have all the necessary equipment and tools on hand to get the job done right. Proper preparation is key to ensuring a smooth and successful amplifier installation, so let’s take a closer look at the essential items you’ll need.
The Amplifier
Of course, the most crucial component in this endeavor is the amplifier itself. As we discussed in the previous section, you’ll need to carefully choose the right model based on your specific audio system and requirements. Make sure to double-check the power ratings, number of channels, and any additional features that might be important to you.
Power Wiring Kit
In addition to the amplifier, you’ll need a specialized power wiring kit to safely and securely connect the amp to your vehicle’s electrical system. This typically includes the following components:
- Power wire (usually 4-gauge or 8-gauge)
- Ground wire
- Remote turn-on wire
- In-line fuse holder and fuse
Proper wire gauge selection is essential to ensure safe and efficient power delivery to your amplifier.
Speaker Wire
You’ll also need high-quality speaker wire to connect your amplifier to the speakers in your car. The gauge of the speaker wire will depend on the distance between the amp and speakers, as well as the total power output of the amplifier.
RCA Cables
To transmit the audio signal from your head unit to the amplifier, you’ll need a set of high-quality RCA cables. These come in various lengths and should be shielded to prevent interference and signal degradation.
Tools
In addition to the electrical components, you’ll also need a selection of tools to effectively install the amplifier. This includes:
- Wire cutters/strippers
- Crimping tool
- Multimeter (for testing connections)
- Screwdrivers (flat-head and Phillips-head)
- Drill and drill bits (for mounting the amplifier)
- Cable ties or loom (for neat wire routing)
Finally, it’s always a good idea to have some additional noise reduction materials on hand, such as electrical tape, foam padding, or sound deadening material. These can help minimize any unwanted electrical interference or rattling that might occur during the installation.
With all the necessary equipment and tools gathered, you’ll be well-equipped to tackle the amplifier installation process with confidence. Let’s get started!
Step-by-Step Car Amplifier Installation Guide
Now that you have a solid understanding of car amplifiers and the required equipment, it’s time to dive into the step-by-step installation process. I’ll guide you through each stage, ensuring you have a clear roadmap to follow and the confidence to tackle this project head-on.
Safety First
Before we begin, it’s crucial to emphasize the importance of safety during this installation. The first and most essential step is to disconnect the negative (-) battery cable from your vehicle’s battery. This will prevent any accidental short circuits or electrical shocks while you’re working on the system.
Choosing the Installation Location
The next step is to determine the optimal location for your amplifier. This decision should be based on a few key factors:
- Accessibility: You’ll want to choose a spot that’s easy to reach, as you’ll need to access the amplifier for adjustments and troubleshooting.
- Ventilation: Car amplifiers generate a significant amount of heat, so you’ll need to ensure there’s adequate airflow around the unit to prevent overheating.
- Available space: Measure the dimensions of your amplifier and find a suitable mounting location that won’t interfere with other components or the vehicle’s structure.
Once you’ve identified the perfect spot, make a note of it, as we’ll revisit this location during the installation process.
Running the Power Wire
One of the most critical steps in amplifier installation is properly routing and connecting the power wire. Here’s how to do it:
- Determine the best path for the power wire, running it from the battery to the amplifier location. Avoid areas with potential sharp edges or moving parts that could damage the wire.
- Install an in-line fuse holder near the battery end of the power wire, and connect it to the positive (+) battery terminal.
- Carefully route the power wire through the vehicle, using grommets or protective loom to prevent any chafing or cuts.
- At the amplifier location, connect the power wire to the “+” terminal on the amplifier.
Remember, the power wire must be of the appropriate gauge to handle the current draw of your amplifier. Consult the manufacturer’s recommendations or a knowledgeable installer to ensure you’re using the right wire size.
Connecting the Remote Turn-on Wire
The remote turn-on wire is responsible for automatically powering on your amplifier whenever you turn on your head unit. To connect this wire:
- Locate the remote turn-on lead (usually labeled “Remote” or “REM”) on the back of your head unit.
- Carefully tap into this wire, either by using a wire splice connector or by soldering the connection.
- Route the remote turn-on wire from the head unit to the amplifier location, keeping it bundled with the power wire for a neat appearance.
- Connect the remote turn-on wire to the corresponding terminal on your amplifier.
This step ensures your amplifier will power on and off in sync with your head unit, simplifying the overall operation of your audio system.
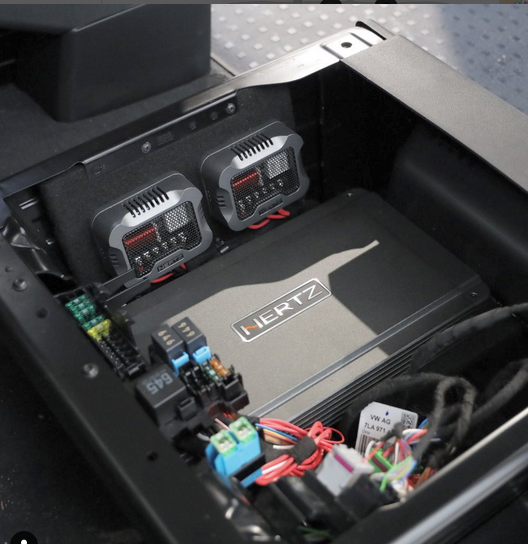
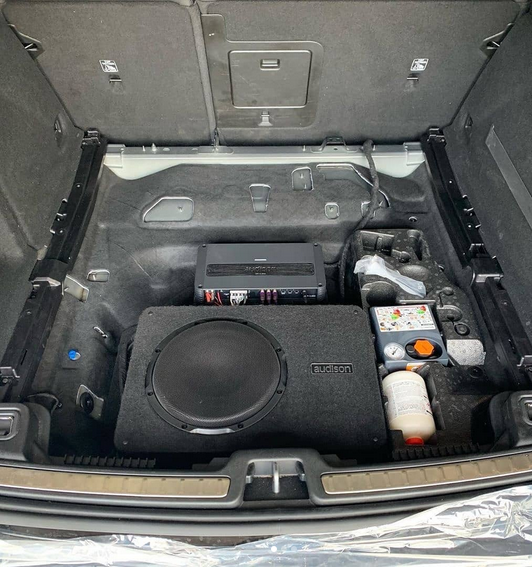
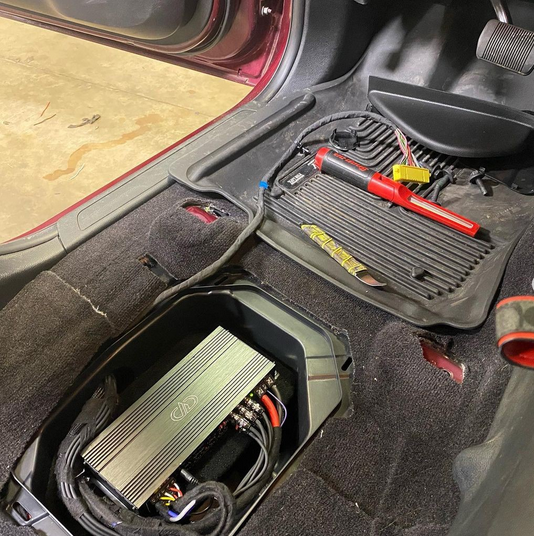
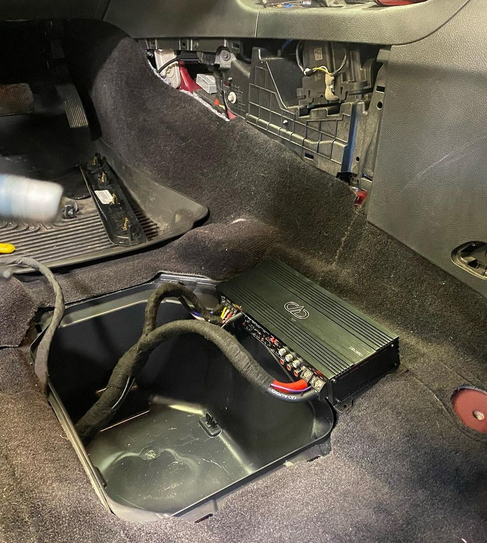
Installing the Amplifier
With the power and remote turn-on wires in place, it’s time to secure the amplifier itself. Here’s how:
- Using the measurements you took earlier, mark the mounting location and drill any necessary holes.
- Securely mount the amplifier, either by using brackets, velcro, or any other suitable hardware.
- Double-check that the amplifier is firmly in place and won’t vibrate or move during operation.
Connecting the Speaker Wires
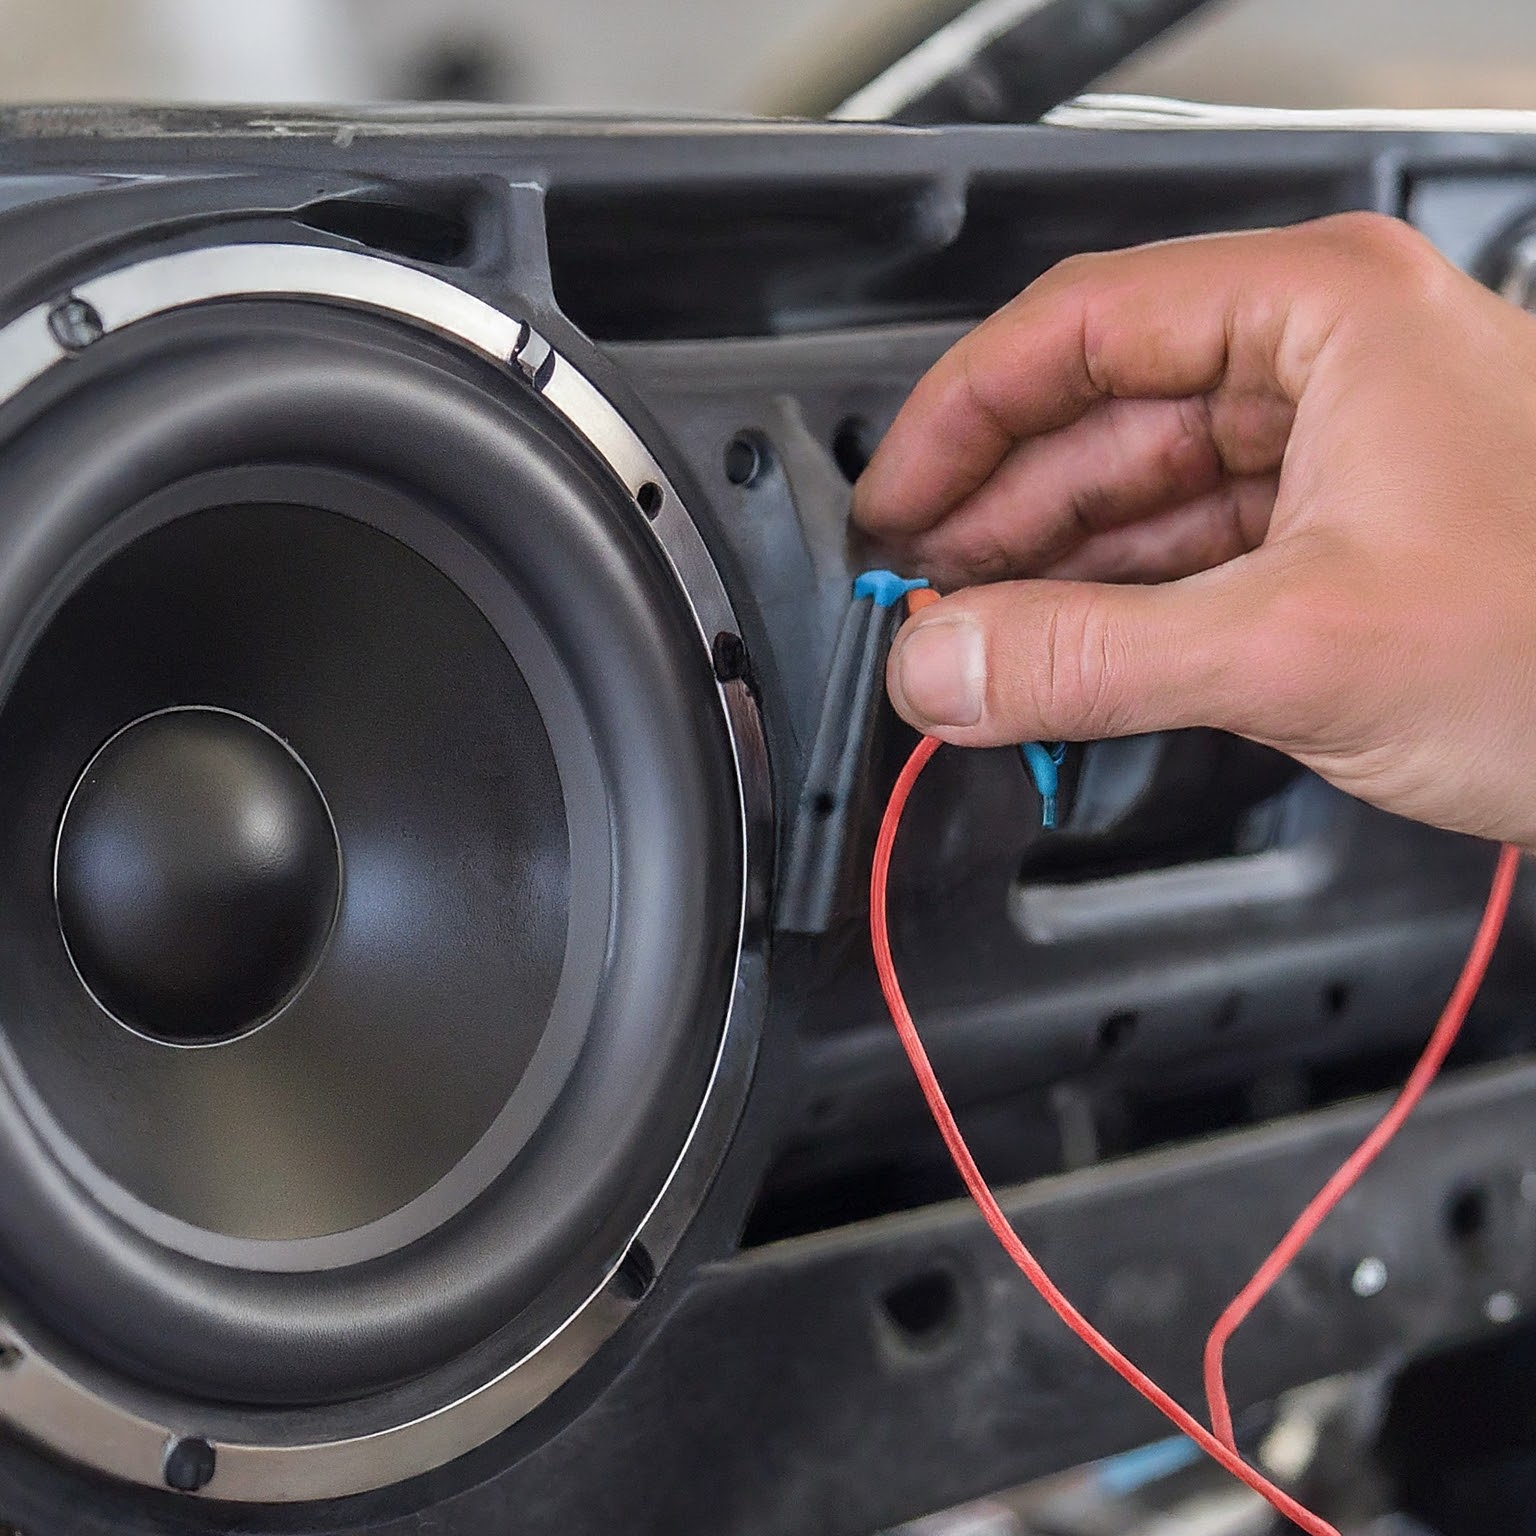
Next, you’ll need to connect the speaker wires from your amplifier to the corresponding speakers in your car. Pay close attention to the polarity (+ and -) of the connections to ensure proper phasing.
- Run the speaker wires from the amplifier location to the speaker locations, again using protective loom or grommets to prevent any damage.
- Connect the positive (+) and negative (-) speaker wire terminals on the amplifier to the corresponding terminals on your speakers.
- Verify that all connections are tight and secure.
Connecting the RCA Cables
The final step in the installation process is to connect the RCA cables from your head unit to the amplifier. These cables carry the audio signal from the head unit to the amplifier, so it’s crucial to use high-quality, shielded RCA cables to prevent any interference or signal degradation.
- Locate the RCA output jacks on the back of your head unit.
- Carefully connect the RCA cables from the head unit to the corresponding “input” jacks on your amplifier.
- Route the RCA cables alongside the power and speaker wires, keeping the bundle neat and tidy.
Turning on the System
With all the connections made, it’s time to power on your upgraded audio system and ensure everything is working as it should.
- Reconnect the negative (-) battery cable.
- Turn on your head unit and check that the amplifier is powering on as expected.
- Start with the volume at a low level and gradually increase it, listening for any distortion or issues.
- Adjust the amplifier’s settings, such as gain and crossover, to optimize the sound quality.
If you encounter any problems during this initial power-on test, don’t worry – we’ll cover common troubleshooting steps in the next section.
Troubleshooting Common Issues
No matter how carefully you plan and execute your amplifier installation, there’s always the possibility of encountering a few hiccups along the way. But don’t worry, I’ve got your back with a comprehensive troubleshooting guide to help you identify and resolve any issues that might arise.
No Power
If your amplifier isn’t receiving any power, the first thing to check is the fuse. Inspect the in-line fuse you installed near the battery and ensure it’s not blown. If the fuse is intact, use a multimeter to test the voltage at the power wire connection, both at the battery and the amplifier end.
If you’re getting power at the battery but not at the amp, the issue could be a wiring problem, a bad ground connection, or a faulty remote turn-on signal. Double-check all your connections and make sure the ground wire is securely attached to a clean, metal surface.
Distorted Sound
If you’re experiencing distortion or crackling coming from your speakers, there are a few potential culprits to investigate:
- Gain settings: Ensure the gain controls on your amplifier are properly adjusted to match the output of your head unit.
- Speaker impedance: Verify that the speakers in your system are compatible with the amplifier’s impedance requirements.
- Wiring issues: Check for any loose, damaged, or improperly connected speaker wires.
If the distortion persists even after adjusting the gain and checking the wiring, it’s possible your amplifier is overheating or malfunctioning. In this case, you may need to have the amp inspected by a professional.
Ground Loop Noise
One common issue with car audio installations is the presence of a ground loop, which can manifest as a persistent hum or whine coming from the speakers. This is typically caused by improper grounding or the creation of a secondary ground path.
To troubleshoot and eliminate ground loop noise, try the following steps:
- Ensure the amplifier’s ground connection is secure and attached to a clean, unpainted metal surface.
- Consider using a ground loop isolator or noise filter in the RCA cable connection.
- Experiment with rerouting the power, speaker, and RCA cables to minimize any potential interference.
If the ground loop persists, you may need to consult with a professional installer or explore more advanced noise reduction techniques.
Other Common Problems
In addition to the issues mentioned above, you may encounter other, less common problems during your amplifier installation, such as:
- Intermittent power or signal loss
- Vibration-induced rattling or buzzing
- Compatibility issues between the amplifier and other components
If you find yourself facing any of these or other unexpected problems, don’t hesitate to reach out to a knowledgeable car audio specialist or consult online forums and resources for additional troubleshooting guidance.
The key to resolving most amplifier installation issues is methodical testing, careful attention to detail, and a willingness to experiment with different solutions. By following the troubleshooting steps outlined here and remaining patient, you’ll be well on your way to getting your upgraded audio system back up and running smoothly.
Tips for Optimal Performance
Now that your amplifier is installed and your system is up and running, it’s time to fine-tune the setup for the best possible sound quality. Here are some additional tips and considerations to ensure your in-car audio experience is truly elevated:
Amplifier Placement
The physical location of your amplifier can have a significant impact on its performance and the overall sound quality of your system. As mentioned earlier, proper ventilation is crucial, but you’ll also want to consider factors like:
- Proximity to the speakers: Shorter speaker wire runs can help minimize signal loss and interference.
- Isolation from vibrations: Mount the amplifier securely to prevent any unwanted buzzing or rattling.
- Accessibility: Choose a spot that allows you to easily access the amplifier’s controls and connections.
Wire Gauge Considerations
The gauge of the power and speaker wires you use in your installation is crucial for maintaining optimal performance and safety. Refer to the amplifier’s specifications or consult with a professional to ensure you’re using the appropriate wire size.
Remember, thicker wires (lower gauge numbers) can handle higher current loads, which is essential for powering high-output amplifiers and subwoofers. Conversely, smaller gauge wires may not be able to safely and efficiently transmit the required power, potentially leading to voltage drops, heat buildup, and even fire hazards.
Cable Management and Appearance
While the sound quality should be your primary focus, the overall appearance and neatness of your amplifier installation shouldn’t be overlooked. Take the time to carefully route and secure all wires, using protective loom, cable ties, and other management techniques to create a clean, professional-looking setup.
Not only will this contribute to the visual appeal of your car’s interior, but it can also help prevent any potential issues, such as wires becoming entangled or damaged over time.
Amplifier Tuning and Equalization
To get the most out of your newly installed amplifier, you’ll need to spend some time fine-tuning the settings to match your specific audio system and listening preferences. This includes adjusting the gain, crossover, and any other controls on the amplifier itself.
Additionally, you may want to consider integrating a dedicated equalizer or signal processor into your system. These devices allow you to further shape the frequency response, tame any problematic resonances, and create a truly customized sound profile.
Remember, optimizing the performance of your amplifier and audio system is an iterative process. Don’t be afraid to experiment with different settings, monitor the results, and make adjustments until you achieve the perfect balance of power, clarity, and bass response.
Conclusion
Congratulations! If you’ve faithfully followed along with this comprehensive guide, you are now the proud owner of a properly installed car amplifier, ready to elevate your in-car audio experience to new heights.
By understanding the inner workings of car amplifiers, choosing the right model for your system, and meticulously executing the installation process, you’ve taken a significant step towards transforming your daily drives and weekend adventures into a true auditory delight.
Remember, if you encounter any issues or have additional questions along the way, don’t hesitate to reach out to experienced car audio enthusiasts, trusted installers, or online forums for support and guidance. The car audio community is filled with knowledgeable individuals who are always eager to lend a helping hand.
So, crank up the volume, blast your favorite tunes, and revel in the powerful, crystal-clear sound that your new amplifier delivers. The days of settling for a lackluster in-car audio experience are behind you. You’ve taken control and elevated your ride to a whole new level.
As you continue to enjoy your upgraded sound system, I encourage you to experiment with different placement options, tuning settings, and even additional audio components to further refine the overall performance. There’s always room for improvement, and the journey of perfecting your car’s audio is part of the fun.
In closing, I hope this comprehensive guide has empowered you with the knowledge and confidence to tackle your amplifier installation project. By following the steps outlined here, you’ve not only improved the sonic quality of your ride, but you’ve also gained a valuable skill that you can apply to future audio upgrades and modifications.
So, what are you waiting for? Get out there, put your newfound expertise to the test, and let the music move you like never before. Happy listening, my fellow car audio enthusiasts!
Best 15 Inch Subwoofer – Top 8 Picks You Should Consider
Best 12 Inch Subwoofer: Top 9 Picks Revealed!
Frequently Asked Questions on Car Amplifier Installation

Kenny Owen is an acclaimed audio expert and longtime enthusiast with a deep passion for sound technology. With over 15 years of experience in the car and home audio industry, Kenny has established himself as a trusted authority on everything from speaker setups and amplifier configurations to the latest audio equipment and innovations.
Through his engaging writing style and meticulously researched articles, Kenny shares his vast knowledge on optimizing audio systems for superior sound quality. He provides in-depth tips and tricks for achieving the best listening experience, whether it’s tuning a car’s audio system for an immersive musical journey or creating a high-fidelity home theater setup. Additionally, Kenny’s comprehensive buying guides empower readers to make informed decisions when investing in audio components, ensuring they get the most bang for their buck.